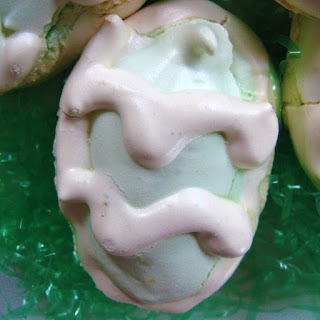
I'll start out by saying that I'm a sucker for meringues. I love them. There's something almost heavenly about them - they hardly weigh anything and have the most unexpected texture for something so hard. Yum.
These delightful beauties came as a complete accident the other night. I was attempting to make a totally different meringue shape - frogs to be exact - and they ended up looking like aliens. I'm not kidding. So, I had some meringue left over and a little extra oven room and decided that I'd make Easter eggs. I'm glad I did.
Because it was a rush job, I wasn't taking a lot of photos along the way as I usually do. I also didn't have much time to take photos to do the finished product justice (hence the much-doctored above photo - I thought it was festive, anyway).
I adapted this recipe from the "Froggy meringue cookies" recipe out of Jewish Holidays Cookbook
Projected prep time: 20-25 minutes; Projected bake time: 2 hours
4 egg whites
2 1/2 cups powdered sugar
1/2 tsp. pure vanilla extract
1/4 tsp. pure almond extract
Food coloring as desired
Preheat oven to 200 degrees and line baking sheets with parchment paper. If you have a gas oven, move your racks to the very top.
Have your egg whites at room temperature and beat them in a large bowl until they are foamy and light.
Add the sugar a little bit at a time, about a tablespoon, while continuing to beat the eggs at a medium-high speed. You may need to stop the mixer a couple of times and scrape some sugar down. When all of the sugar has been mixed in, turn the mixer to high and continue to beat until the meringue mixture is shiny and very stiff. Thick peaks will stand stiff when the meringue is ready. You may have to beat for a while to achieve this.
Remove some of the white meringue at this point if you want white piping. Also, you can remove extra to color different colors.
Add flavorings and food coloring to remaining meringue while mixing on low speed, then return to high to incorporate all of it. You may need to scrape some down.
Place meringue in pastry/icing bags or ziplocs with the tip of a corner cut off and with your main color(s), squirt egg-shaped dollops onto the parchment paper about an inch apart. You'll notice in my photos that I didn't give an inch for all of them. It was an accident and yes, they did puff into each other just a little and easily broke off. If you don't want that, put sufficient space between them.
Take your white color or any other color you have for piping and squirt meringue around the edges of each egg and decorate the tops.
Bake (top rack if gas oven) at 200 degrees for about 2 hours, possibly longer depending on the thickness of your cookies. The meringues should be hard all the way through and come right off the parchment paper. If you prefer to have a softer center, bake them for around an hour. The outside will be hard and have a great crunch, but the center will have a fantastic softer and chewy texture.
Cool pans on wire racks and then transfer meringues to an airtight container lined with wax paper. Store at room temperature. You don't want any humidity to be in that container, so make sure they are completely cooled.
Have fun with them! I do plan on making some of these at some point again - maybe not until next Easter, but when I do have new meringue eggs, I will also hopefully have better photos. I'll share them then.
And enjoy eating them! If I don't get another post in before Easter, have a blessed and very happy Easter!
I will be making hot cross buns with my family tomorrow. The last couple of years, I've used Living Without's hot cross buns recipe found here. They are good. However, I've missed the taste and texture of the hot cross buns my mom made for us every Good Friday while I was growing up. Tomorrow I'm attempting my own recipe/adaptation of the one she used. I'm hoping it works out! If it does, I'll share it with you soon. Again, have a happy and blessed Easter!


These look delicious and are super cute! Glad to be a new follower :)
ReplyDeleteThank you - glad to have you Kelly!
ReplyDeleteI'd love to get your hot cross bun recipe if it works out. My mom makes host cross buns every year, and she tried a gluten free mix one time but it didn't turn out so well. Happy Easter to you too!
ReplyDeleteI'll definitely share it if it works out - keeping my fingers crossed! :) The recipe I post the link to above from Living Without is good, but like I said, it's not the same or even close to the same.
ReplyDelete