Showing posts with label photography. Show all posts

Wednesday, May 2, 2012

Just Plain Bagels


Hello, friends. It's been a few weeks, hasn't it? I won't use this post to go into everything that has been happening in my life but if you are a regular reader, you know something must be up (other than this wretched health issue I'm battling) because things have been quiet and I haven't even been posting my photos of beauty every day, or almost every day.

I'll just leave it, for now, with telling you that first, I've been playing Mama Hen to some incredibly sweet and precious baby chicks that became part of our family the day after they hatched. 


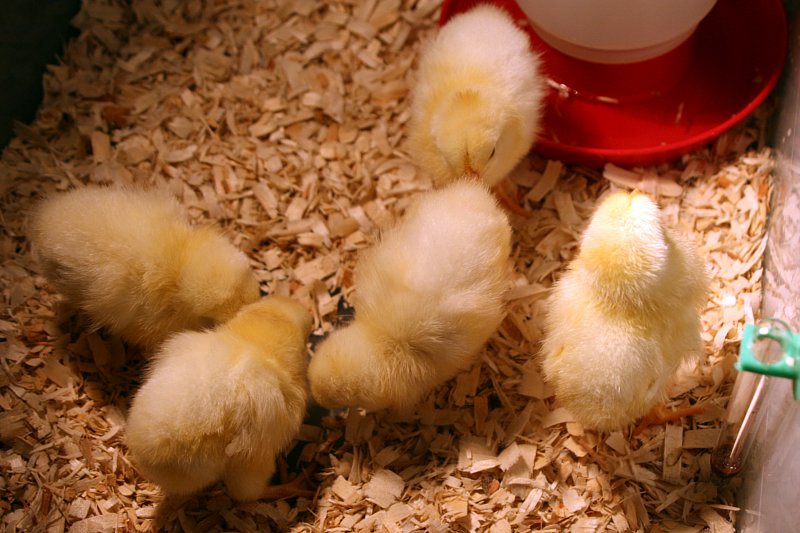
We started with five, but my favorite (Guinevere) didn't make it, as you know if you are on my facebook page. It was a traumatic event that I won't go into in this post. The other four - Snowflake, Peekaboo, Fluffy and Daisy - are staying healthy and strong and we look forward to having fresh eggs in several months. I'll share more photos of them and information about them when I have a chance sometime.

Secondly, the photos of beauty have been missing partly because I've been so busy and partly because I accidentally formatted the compact flash card on my camera with a couple of weeks' worth of photos that I hadn't yet uploaded ... erasing every single one of them. HOWEVER, I made two cheap purchases on software and a card reader and got them ALL back yesterday! :) Again, I'll share some of those photos with you on another post - as well as tell you what I did to recover them in the event any of you ever find yourselves in a similar situation.

For now, let's get back to the reason for this post: The Gluten-Free Ratio Rally day is here again and this month we did bagels. Many thanks to Morri from Meals with Morri, our host for this month's challenge, for choosing bagels and hosting us this month! You can find her blueberry oat bagels (Yum!) and links to all the the rally participants' bagel recipes on her blog post here. I'll have a list at the bottom of this post of the other recipes with links at a later time. I'm really looking forward to trying out some of these other bagel recipes, especially considering I'm just not as happy with mine as I wanted to be!

Logo designed by Anile Prakash
If you're not familiar with the ratio rally yet, it's where a group of bloggers come up with recipes based on a ratio for a specific gluten-free challenge each month. Working with ratio and weight frees you in your kitchen more than you can imagine. For more information and previous recipes and challenges, you can visit my rally page here.

Before you get too excited about my "just plain bagels" recipe, let me tell you that I'm not completely happy with the way mine eventually turned out after trials, and I plan to keep at it and have a better recipe for you at some point. Given everything going on this month, I didn't get to play around with the bagels as much as I'd planned and nearly didn't write this post ... however I figured I'd keep it real and share my bagel-making experiences with you. This month was, after all, my very first bagel-making attempt - gluten-free or otherwise.

The final result before deadline proved to be a decent sort of bread. I wouldn't think it fair to really call it a bagel - and I realize that's coming from someone who isn't from New York or anywhere in the Northeast at all. I do, however, think I have a pretty good idea of what a true bagel is and how it should taste. I've had them and they are good. My bagels turned out to be ... rolls with a hold in the middle? ... that taste quite good sliced in half and covered with cream cheese. They were a little on the dry side but not too bad and lacked the amount of chew I was aiming for. They tasted too much of yeast, even after I cut back on the yeast.

Next time, I'll be trying Bruce Ezzell's bagel recipe on Michael Ruhlman's site. This is the first recipe I studied for bagels and had planned to go with adapting it, but then suddenly decided to try converting the Joy of Cooking bagel recipe to an easy ratio instead. As noted above, it's decent but not what a bagel should be. Mr. Ezzell's will no doubt taste more like a bagel once I get around to figuring my flours for it and giving it a few trials.

The ratio I used for the Joy of Cooking conversion is 9 parts flour: 4 parts liquid: 2 parts egg: 1 part fat. For this recipe, I've halved the ingredients of the original. I also greatly reduced the amount of yeast. They tasted more yeasty right out of the oven but some of that left after cooling.

(Printable Recipe)

4 ounces (half cup) scalded milk
1 ounce (2 tbsp.) butter
1/2 Tbsp. sugar
1/2 tsp. kosher salt
1/2 tsp. plus 1/16 tsp. active dry yeast
2 ounces egg (1 large egg), beaten
1 ounce (28 grams) tapioca starch
1 ounce (28 grams) potato starch
1 ounce (28 grams) arrowroot starch
2 ounces (56 grams) brown rice flour
2 ounces (56 grams) sorghum flour
1.5 ounces (41 grams) millet flour
.5 ounces (13 grams) teff flour
1/2 tsp. ground chia seed
Boiling water with 1 Tbsp. sugar added to it.
Egg white, for egg wash, if desired

Combine hot milk with butter, sugar and salt in large saucepan or bowl. When mixture is cooled to 115 degrees, add yeast and let sit for 5-10 minutes.

Sift flours together with ground chia seed.

Blend in egg and flour with wooden spoon and continue to beat with hand for a couple of minutes until everything is mixed well.

Cover with damp cloth and let rise in warm place for an hour and a half to two hours, until dough has doubled.

Bring water and sugar to simmer in large, deep skillet or saucepan.

Punch down dough and form into equal pieces (I did nine smaller bagels that fit nicely in the palm of my hand after all the rising, poaching and baking. You could do larger ones.) Roll into balls and slightly flatten in hands and make a small hole in the center with finger.


Let rest for 15-25 minutes or until nearly doubled. While your water is coming to a simmer/low boil, preheat oven to 375 degrees and line baking sheet with parchment paper.


Place each bagel into simmering to boiling water for one to one and a half minutes on each side. I'll tell you that I played around with this: I did some for 30 seconds on each side and they fell the most during baking. All of the bagels fell somewhat either during baking or during cooling, but the ones I poached the least amount of time flattened the most. The ones that went for nearly a total of three minutes seemed to do the best.

Remove from water with slotted spatula and drain a couple of seconds before placing on baking sheet lined with parchment paper. If desired, brush tops with an egg white wash.

Bake 20-25 minutes (top rack if gas oven), or until done and not doughy inside. You may want to flip them over to even the browning out a little the last four to five minutes of baking.


These taste best fresh and with some cream cheese slathered on. Enjoy! 

Don't forget to check out Morri's host post of blueberry oat bagels, as well as the other amazing bagel recipes baked up for you this month! Thanks again, Morri!

And I do have one photo of beauty for you today. I just couldn't resist the beauty of the desert bird of paradise tree in our front yard against the backdrop of a gorgeous sunset. I hope you're finding beauty in your day today! (Why I'm sharing this: http://mamameglutenfree.blogspot.com/2012/02/beauty-in-eye-of-beholder.html.)


Thursday, April 5, 2012

Hot Cross Buns


Do you have a tradition of eating hot cross buns on Good Friday like we do in our family? Every Good Friday I can remember as a child included eating delicious hot cross buns my mother had made that day.

Smooth, round rolls of sweet bread dotted with raisins and crossed with a delicious glaze on top. They made the house smell good and I couldn't wait to eat them. We'd sing the "Hot Cross Buns" song and talk about what the cross represented on the buns that special day.

My mom is currently living in England, so she's getting the authentic treat right now and says the bakery windows are filled with these yummies.

I've made different recipes of gluten-free hot cross buns over the last couple of years and I think this year I finally came as close to recreating Mom's originals from the Joy of Cooking recipe as I will probably get. Last year I played around with different flours but didn't get anything with a decent texture. They were more like bread-type cookies.

This year I used the some of the same flours I use in my yeast bread recipe and had success. For these photos, I placed the dough in muffin tins to be sure they came out round. When I make these again on Friday, I'll attempt them on baking sheets in what will hopefully bake into nice round rolls (I'll try a tester first and use muffin tins again if they don't turn out). They don't look quite the same as my mom's, but the taste is definitely there. And it's definitely good!

Another thing I like about this recipe is I used just a saucepan and wooden spoon. No mixer required!


Projected time, start to finish including rise: About 2 1/2 hours
(Printable Recipe)

1 cup milk
2 Tbsp. unsalted butter
1/4 cup organic pure cane sugar
1/2 tsp. kosher salt
1/4 tsp. ground cinnamon
Pinch of ground nutmeg
1/4 cup raisins
1 Tbsp. fresh lemon zest or 1/2 tsp. dried lemon zest
2 1/2 tsp. active dry yeast
2 Tbsp. very warm water
1 large egg
2 cups Pamela's bread mix and flour blend (not the baking mix)
2/3 cup millet flour

Icing for cross:
1/4 cup powdered sugar
1/8 tsp. pure vanilla extract
1 tsp. milk

In a large saucepan, heat milk until hot but not boiling.

Add butter, sugar and salt, stirring until dissolved. Add cinnamon, nutmeg, raisins and lemon zest. Let cool to warm. (You want it just warm enough to not cook the egg.)

In a small bowl combine warm water and yeast, let sit for a few minutes. Stir into milk mixture.

Beat egg into milk mixture.

Sift flours together and pour a small amount into the milk mixture, stirring with a wooden spoon. Continue adding a little at a time, beating with the wooden spoon, until it's all mixed. Continue to beat with wooden spoon for about a minute or so, until everything is combined well and a nice dough has formed.

Place in a large greased bowl and cover with a damp towel. Set in a warm place to rise, about an hour, until doubled.


Doubled ...

If using muffin tins, grease them first and then place 18 equal portions into the tins. If you want to try shaping the buns yourself, grease baking sheets and round 18 balls to place on the sheets.


Cover again and let rise in warm place until nearly doubled again, about 30 minutes.

Preheat oven to 375. You'll want to use the top rack if you are using a gas oven. (I'm playing with it here. The original recipe called for 425 degrees and I started with 400. They were baking too fast so I lowered it to 375 and baked for less time. I'm giving you an estimate on the full time at 375 until I make them again.)

Bake approximately 15-20 minutes or until done.

Let cool completely and then make crosses on top with the icing.

To make the icing, in a small bowl combine the powdered sugar, vanilla and milk. Stir well to combine. If it's not thick enough to hold a line to form the cross, add a little more sugar at a time until it is.

Enjoy!


For my photo of beauty, I'm sharing another flower photo. We have wildflowers blooming for spring - not as many as I'd like with the drought going on but enough to enjoy their beauty. I love the vibrant red and orange in the Indian paintbrushes. I hope you have a beautiful weekend, and Happy Easter!


Wednesday, April 4, 2012

Triple Chocolate Brownies


Brownies from scratch. Those three words have always made my mouth water instantly, like Pavlov's dog. Brownies from a box aren't bad, but from scratch have always had that extra something that you can't quite put your finger on but you know it's good.

I love that brownies are versatile, full of flavor combinations, possibilities and textures and fairly simple to whip together and bake. They are perfect for any time of the year and nearly any occasion. So I was happy to see that Mary Fran from FrannyCakes, our host for this month's Gluten-Free Ratio Rally, had chosen brownies as our challenge. (Thank you, Mary Fran!)

Logo designed by Anile Prakash

Be sure to stop by Mary Fran's host post of Gluten-Free Hazelnut (Nutella) Brownies (be still, my heart! Nutella!) and drool over her offering as well as all the other amazing recipes my fellow participants baked up for you this month.


I chose to go with chocolate brownies because I felt chocolate was the perfect way to celebrate my one-year anniversary with the rally. I got started the second month into it last year, and I haven't regretted a minute of it. It's been so fun to have my eyes opened to possibilities I never imagined in the kitchen, as well as get to know my fellow rally bloggers a little bit better.

If you aren't familiar with the rally yet, you can learn more at the original introduction post by Shauna at Gluten-Free Girl as well as my other rally recipes that link up to the hosts each month on my Gluten-Free Ratio Rally page. By baking and cooking with weight and using a ratio, you can free yourself to create endless possibilities in your kitchen.

For these brownies, I came up with a ratio of 2 parts sugar: 1part fat: 1 part egg: 1 part flour. I based this from a recipe I created when I was pregnant with my oldest and was home alone for a week in desperate need of some serious chocolate. For this challenge, I played around with the flours and types of sugar and chocolate, and these ratio brownies ended up being less chocolate-y than the original gluten ones from years ago. My husband doesn't care for chocolate as much as I do, so I settled on cocoa powder for the final recipe I'm sharing today rather than the melted baking chocolate the originals call for.

I wish I could say the final product is perfect, but for me to call them perfect they would have a bit more chewiness to them. (Edit: Psssst ... I finally achieved it! See the edit in directions for the chewy perfection! This also gives them an awesome crunchy top.) That being said, however, I think that's all they are missing. If I baked them a little longer, they may or may not come out a little chewier and I might try that next time (tonight, maybe?). They aren't really cake-like brownies but are very fudge-y. I wish they had a little more chew, but I'm still quite happy with the texture and the entire pan was eaten quickly by everyone in the family. They definitely meet all the requirements in my mind for a really good from-scratch brownie taste.


Projected prep time: 10 minutes; Projected bake time: 25-30 minutes
(Printable Recipe)

4 ounces (1 stick, 1/2 cup or 8 Tbsp.) butter (I used salted)
1/3 cup unsweetened cocoa powder (forgot to weigh, will edit next time)
8 ounces pure cane sugar (I used refined sugar for this recipe)
1/2 tsp. kosher salt
1 1/2 tsp. pure vanilla extract
4 ounces eggs (2 large eggs)
2 ounces (56 grams) brown rice flour
1 ounce (28 grams) teff flour
1 ounce (28 grams) potato starch (you can use tapioca here instead but I liked the potato texture a little better)
1 tsp. ground chia seed (I use Salba brand)
2 ounces (56 grams or about 1/3 cup) semi-sweet chocolate chips
2 ounces (56 grams or about 1/3 cup) white chocolate chips
1/2 cup chopped pecans, optional (forgot to weigh, will edit next time)

Preheat oven to 350 degrees and grease an 8x8 baking pan.

Sift flours together with ground chia.

Melt butter in medium saucepan over low heat and cool to lukewarm.

Mix in sugar and stir until smooth. Mix in salt, cocoa and vanilla and stir until well-incorporated.

Mix in eggs until smooth.

Mix in flour blend until smooth.

Mix in chocolate chips, white chocolate chips and pecans.

Spread into greased pan. (Edit: If you want to achieve the chewy factor, let the batter sit in the pan for a minimum of 30 minutes, preferably an hour, before baking. Then try to let them cool before cutting them - they will be great!)

Bake for approximately 25-30 (they'll be a little chewier at 30 minutes) minutes or until done. For best results, let cool before cutting. (But they are good hot and gooey!)

Enjoy!


Please don't forget to stop by Mary Fran's post to see her delicious brownies, as well as all the other amazing brownies baked up by the participants this month! Just look at this list - how can you not be hungry for brownies right now? Thank you, again, Mary Fran!

Adina from Gluten Free Travelette made Chocolate Brownie Pie with Orange Zest
Angela from Angela's Kitchen made Gluten & Dairy Free Cream Egg Brownies
Brooke from B & the boy! made Triple Chocolate Brownies
Caitlin from {Gluten Free} Nom Nom Nom made Peppermint Brownie Bars
Caleigh from Gluten Free[k] made White chocolate and marshmallow brownies
Caneel from Mama Me Gluten Free made Triple chocolate brownies
Charissa Luke from Zest Bakery made Slutty gluten-free brownies
Claire from My Gluten Free Home PB&J Brownie Whoopee Pies
Claire from This Gluten-Free Life made St. Patty's Day Marshmallow Swirl Brownies
Erin from The Sensitive Epicure made Mexican Cocoa Brownies with an Almond & Pepitas Crust
gretchen from kumquat made salted caramel brownies
Heather from Discovering the Extraordinary made Nutmeg Blondies
Irvin from Eat the Love made Blueberry Citrus Marble Brownies
Jean from Gluten-Free Doctor Recipes made Blue Ribbon Brownies
Jenn Cuisine made Grain free brownies with no-bake ricotta cheesecake cream
Jonathan from The Canary Files made Vegan Marbled Banana Walnut Brownies
Karen from Cooking Gluten Free! made GF Chewy Crackled Top Brownies with Raspberry Puree
Mary Fran from FrannyCakes made Gluten-Free Hazelnut (Nutella) Brownies
Morri from Meals with Morri made Oaxacan Brownies & Mesquite Cacao Blondies
~Mrs. R from Honey From Flinty Rocks made Black Bean S'More Brownies
Pete and Kelli from No Gluten, No Problem made Caramel Mexican Chocolate Mesquite Brownies
Rachel from The Crispy Cook made Co-Co Nut-Nut Blondies
Shauna from Gluten-Free Girl made Gluten-Free Brownies
Tara from A Baking Life made Mint Chocolate Flourless Brownies
TR | No One Likes Crumbley Cookies Gluten Free Berry Fudge Brownies 

(And for my photo of beauty today, I'm sharing another bluebonnet photo from my neighbor's gorgeous crop. Can you find the ladybug? I love all the blue surrounding me this time of year - I hope you are finding the beauty surrounding you!)


Why I'm sharing this: http://mamameglutenfree.blogspot.com/2012/02/beauty-in-eye-of-beholder.html

Tuesday, April 3, 2012

365 Project - March!


Another month has gone by and April is here. My girls just have two months of school left until summer break!

I'm so glad I've been documenting some of the things I've found beautiful and/or interesting in my days through the camera. I have a feeling it will turn into a lifetime hobby that I can't live without.

Above you can see all the photos I've shared on my 365 Project page for March.

Below, I wasn't able to get too close but there were two (male and female) woodpeckers in a neighbor's tree during a brief walk the other day. They were making so much noise and seemed to be pleased with the results of their work.

Tomorrow, I'll be sharing this month's ratio rally challenge (brownies!) and plan to share a successful hot cross buns recipe with you on Thursday.

I hope you find beauty in your day today!


Why I'm sharing this: http://mamameglutenfree.blogspot.com/2012/02/beauty-in-eye-of-beholder.html

Monday, April 2, 2012

Easy Eggplant Cacciatore


It's a great feeling when you come up with an experimental recipe AND it doesn't take too long. Many times the experimental recipes I'm happy with are delicious, but they take longer than I anticipated or have several steps to get them "just right." This is one of those recipes that is fairly quick and you can't get much simpler as far as how to prepare it. It was a winner in our home, and will be made time and time again.

I was thinking the other day of how easy my chicken cacciatore recipe is and how much I love that it lasts for more than one meal. I wanted to do something different, though, and make it even healthier. I can do without meat for most of meals and wanted something that was very filling and would last for leftovers. I switched out the chicken for eggplant in this recipe and wasn't disappointed. It uses only three ingredients!

In the photo above, I just spread a little spinach to the side of the cacciatore. To eat it, I served over a bed of fresh spinach. The spinach wilted a little from the heat and they taste great together.

Projected time, start to finish: Under 1 hour (note if you use brown rice, this will take a little longer unless you cook it in advance)
(Printable Recipe)

2 medium eggplant
Kosher salt
3 cups cooked rice
23 ounces marinara sauce of your choice (I used a jar of Prego marinara)

Start rice to cook, unless you cooked it ahead of time. (When it's finished, let it sit.)

Wash eggplant and chop off ends. No need to peel. Slice eggplant into 1/2-inch (approximately - you don't want them too thin) rounds and then cube the rounds by slicing vertically and then horizontally. You want good-sized chunks of eggplant.

Place eggplant in large bowl and generously sprinkle with kosher salt, tossing to combine. Let sit for about 15 minutes to draw out some of the moisture.

Preheat oven to 375 degrees and line a baking sheet with parchment paper.

Place eggplant in a colander and rinse off the salt, shake to remove excess water then pat eggplant with paper towels to remove more moisture.

Turn eggplant onto parchment paper in a single layer on baking sheet. Bake for 20 minutes.

Pour marinara sauce into large pan or skillet, then add eggplant and stir to coat. Heat on medium heat until bubbling, then cover and simmer for 10 minutes. Fluff rice while eggplant simmers.

Add rice to eggplant, stir to combine and simmer for five more minutes.

Serve with salad or over a bed of fresh spinach (heat will wilt spinach a little bit).

Enjoy!


My photo of beauty today isn't the best quality, but it was the best I could get of this mockingbird. Because I wasn't trying to sleep, the chatter didn't bother me. It was running all around in the front yard making all sorts of racket and looking quite cute.

Why I'm sharing this: http://mamameglutenfree.blogspot.com/2012/02/beauty-in-eye-of-beholder.html

Friday, March 30, 2012

Beauty Over the Days


I feel like the last couple of weeks have been whirling around in a twister, which is why I thought the above photo was appropriate. This was taken from my front yard the other day, but don't worry - it's just a dust devil, not a tornado. We are still in a heavy drought so we've been seeing a lot of these devils lately. You certainly don't want to be in their path!

On my way to pick my girls up from school, I saw a different one that was more defined than any I'd seen in my lifetime. It was storming in the area, but hadn't hit in town yet. If the clouds had been just slightly different, I would have sworn it was a tornado instead of a dust devil. (I have seen, in person, a tornado form from the sky and come out of the clouds to touch ground.) This was the most twisty and defined dust devil I'd ever seen and it reached what must have been at least 200 feet into the sky - probably much more. I raced home after getting them, hoping to capture it but it fizzled as we got home. This one popped up in a different location several minutes later.

My daughters ran inside to hide, convinced the dust devil would hit us hard. (It didn't.)

I haven't done a good job the last two weeks of sharing the beauty I've been finding and capturing. It's been therapeutic for me, but I just haven't had the time or energy to get them shared with you each day like I'd been doing. I'm hoping this is my catch-up post and it will go back to being regular again. Here are more photos I've taken recently:

Little hands, purple flowers
Pyrrhuloxia eating insects (it never lets me get too close - this was from the window)

Monarch

Just chillin

Triple view

Sunrise sky

Bee in redbud, cross process. (Love the bokeh on this!)

Sunset

The bluebonnets are blooming!
Believe this is a great tailed grackle. It was the male - smaller female was following. They are so annoying when I'm napping, but I thought he was pretty impressive to look at in my neighbor's tree!

Buzzards in the sunset

I hope you have a beautiful weekend!

Why I'm sharing this: http://mamameglutenfree.blogspot.com/2012/02/beauty-in-eye-of-beholder.html

Wednesday, March 28, 2012

Eagle Mama


Are you all having a good week? It's been a better week for me than last, most definitely. I'm still a little sluggish after it all, but I've been trying to take those photos all along. I hope to place several in one post later to play catch-up. (I also made an incredibly easy and quick eggplant dish last night that I look forward to sharing with you soon.)

Are you in need of some soothing entertainment from time to time in your day? I've been watching this beautiful mama eagle and her eggs the last few days with my family. My daughter's teacher shared the link with me and I must share it with you if you haven't discovered the Decorah eagles yet. The first baby broke through its egg yesterday after many hours of hard hatching work. The other two baby eagles will hopefully follow soon.

(The photo above is a screen shot I captured earlier today.) I hope you find beauty in your day today, and if you're in need of some inspiration, click on this link to watch beauty in nature in one of its finest moments: http://www.farmyou.com/falcon_cams/decorah_eagle_xcel.html

Why I'm sharing this: http://mamameglutenfree.blogspot.com/2012/02/beauty-in-eye-of-beholder.html


Friday, March 23, 2012

Constants in the Sea of Life


Have you ever been at the beach, enjoying your time in the water, and suddenly you're knocked down by one wave and have more crashing upon your head one after another? You try to get to the surface and just as you take a gasping breath, another wave pummels your head under water. Crash! It's a scary feeling.

Have you also ever been there and suddenly felt the pull of a rip current? You feel kind of helpless.

The shore is your constant in both cases - the first you just want to get back on it and the second you must get it in your sights and swim parallel to it until you're out of the current. You can't fight the current. You can't swim against it. You must lock your eyes on that constant and stay parallel to it.

That's been me this week. I've had one of those weeks where one life wave after another has come crashing upon my head, leaving me feeling weak enough to not pay attention and feel the pull of life's rip current. Not the best scenario for someone who's trying to recover from such a seemingly forever illness.

After I've taken care of the necessities in our lives each day (of course that includes food!), I haven't had much energy left.

The constants in my life have kept me afloat this week: My family, good friends, my dogs, the birds at our feeders. The mountains I see in my windows. God has placed these constants in my life and I am so grateful.

You see, even though I've been too fatigued to even edit or resize photos, I've still been trying to take photos of beauty surrounding me each day. I've also been writing in my grateful journal. (What's that, you say? A grateful journal - a small book I just last week started recording things I'm grateful for each day. The idea was inspired by Laureen over at Fox in the Kitchen. Thank you, Laureen!)

Being thankful for beauty around me and the constants in my life has really helped me stay on the surface this week. We live on the base of one mountain, so I see the top of it from one side of the house and the view above from the other side of the house. This is what they look like in the morning.

I love having these constants - there's some security in that. No matter how many things are swirling around me, I can look up and see some things standing strong, or going about life as normal. It's a reminder that "this too shall pass." Sometimes life sucks (or sucks the life from you!) but you move on. Things do get better, or you at least eventually learn to cope with the circumstances handed to you.

Chin up and enjoy the beauty surrounding you this weekend!

Why I'm sharing this: http://mamameglutenfree.blogspot.com/2012/02/beauty-in-eye-of-beholder.html

Friday, March 16, 2012

First Monarch


In the midst of a day that could have been very ugly for me, I forced myself to get out and enjoy some beautiful times. Even if I have a bad day, I need to find beauty. We all do.

We spent some time this morning with a close family friend, laughing, talking and enjoying her always-beautiful yard no matter what time of year it is. We were sitting down to a snack when my oldest spotted a monarch flitting about a bush about 30 feet away. We all ran over there with our cameras and tried to capture its beauty on the gorgeous purple flowers. (I have more photos of this time to share with you later.)

This is the first monarch I've seen this spring. Today was the perfect day for me to see it.

Later, we were blessed with a short but beautiful rain shower complete with thunder that freaks the dogs out. We've been in a terrible drought for more than a year, and it was about a year ago that we became plagued with one wildfire after another. We still are in desperate need of rain - lots and lots of rain - so we welcome every drop that falls from the sky. What once was a dreary thing for me living in another part of the country is now a wondrous sight and sound.

I'll have a busy weekend filled with family time so I don't know if I'll get another post in over the weekend. I hope your weekend is filled with beauty!

Why I'm sharing this: http://mamameglutenfree.blogspot.com/2012/02/beauty-in-eye-of-beholder.html

Thursday, March 15, 2012

Lucky Leprechaun Surprise Chocolate Mint Mug Cake


You remember that mug cake I made the other day? Well, I can't seem to get them out of my mind. I've been making different flavors, and thought I'd better share this one with you before Saturday.

Mint-flavored chocolate cake with a hidden green creamy surprise inside - all in a lucky 7 minutes. (Had to add a couple of minutes in there to make the creamy goodness!) You'll want to try this any time of year, but it also serves as a nice green treat for St. Patrick's Day. (So does a salad and other veggie greens - be sure to get some of those in!)

If you are looking for other gluten-free St. Patrick's Day goodies, I do have an Irish "Spotted Dog" soda bread and these fantastic clover cookies from last year. I've had my eye on some of the other gluten-free soda breads in the food blog world, though, and they do look amazing. Some of them are even vegan, so I'll have to give them a try at some point!

I'm also thinking I may give Stephanie's dijon corned beef a try in the crockpot this year - she says it's not slimy and I believe her. You can't beat the ease of a crockpot meal!


Projected time, start to finish: 7 minutes
(Printable Recipe)

Cake:
1 large egg
4 Tbsp. Pamela's baking mix (not bread flour blend)
3 1/2 Tbsp. pure organic cane sugar
3 Tbsp. milk
2 1/2 Tbsp. extra virgin coconut oil (tip: warm to above room temp to make it liquid)
2 Tbsp. unsweetened cocoa powder
1 tsp. pure vanilla extract
1/2 tsp. pure mint extract (I used mint in this case, not peppermint, but peppermint would probably work fine)

Cream filling:
2 Tbsp. cream cheese
3 tsp. powdered sugar
1 tsp. egg white (from egg in mug)
1 drop green food coloring

Grease inside of large microwaveable mug. Crack egg into mug first because you'll need 1 tsp. of the egg white for the cream filling.

In a separate small bowl, combine cream cheese, powdered sugar, egg white and green coloring until smooth. Set aside.

Add remaining cake ingredients to mug and mix with a fork until everything is incorporated very well.

Drop cream cheese mixture into middle of cake batter.

Microwave on high for 1 minute and 30 seconds.

Enjoy!


This morning the girls and I had some excitement about our birds - not one but TWO chipping sparrows were flitting about under the feeders and among the branches outside our dining room windows. We hadn't seen chipping sparrows (house sparrows are what usually visit us) since last year, and we don't see them very often when they are around. I guess spring brought them back for a while.

I hope you have found beauty in your day today.


Why I'm sharing this: http://mamameglutenfree.blogspot.com/2012/02/beauty-in-eye-of-beholder.html

Wednesday, March 14, 2012

Shells Today


My daughters spent some time outside today. It was a beautiful day and perfect for all sorts of pretend play. My oldest wanted to sweep the patio area off first, so my youngest occupied herself with placing their newest shells from the beach last summer into a deliberate line on top of our deep freezer. She was so intent on her method, I just had to capture some of it. Of course, I also loved the colors she chose (with help from big sister) to wear today.


I hope you are finding beauty in your days!

Why I'm sharing this: http://mamameglutenfree.blogspot.com/2012/02/beauty-in-eye-of-beholder.html

Tuesday, March 13, 2012

Bee in the Redbud Tree


We have redbud trees blooming all around us. The redbud tree we own is a strange tree - it has tiny pink buds slowly cropping out and one little bitty branch with green leaves starting up. The photo above was taken of one of our neighbor's redbud trees, which is blooming larger flowers so far and no green leaves. Most of the other neighborhood redbuds are doing what our neighbor's are doing ... leave it to my redbud tree to bloom to its own drum.

It's lovely to be surrounded with such pink beauty at the moment. When you walk outside, you can smell the sweetness of the blooms. So can the bees - they were covering this tree as I took photos.

I love winter. Fall and winter are my favorite times of year. But when such beauty crops out in the spring, how can you not love this time as well?

Find beauty in your week!

Why I'm sharing this: http://mamameglutenfree.blogspot.com/2012/02/beauty-in-eye-of-beholder.html

Monday, March 12, 2012

Banana Mug Cake


Mug cake. The amazing desserts/snacks that you can mix in a mug, then "bake" in the same mug. All under 5 minutes, from start to ready. I'm in.

I recently saw Jessica's chocolate mug cake recipe on ATX Gluten-Free and had to try it (with a few very minor adjustments) after pinning it. It just kept calling my name. It was very, very good. Very. It was a quick fix for the girls as a special Friday after-school snack.

It wouldn't be wise to make mug cakes as often as I'm tempted to after trying that chocolate one, but I was intrigued and wondered what other flavors I could come up with? (I'll be playing around with them for a while.) My husband cares for chocolate the least of cake flavors, and he loves banana. I'm also on a bit of a warmed bananas kick these days. Why not? I played around with it and had success. Delicious, easy success. It was even fluffy.


While I felt one mug of cake was a little much for one person (I felt pretty full after eating one), my husband had no trouble eating his mug - and topped his with vanilla ice cream as well. He was a very happy man. I do suggest giving the mug several minutes to cool before diving in - the cake stays hot pretty much the whole time. Unless, of course, you top yours with ice cream.

Projected time, start to finish: 5 minutes
(Printable Recipe)

4 tbsp. Pamela's baking and pancake mix (not bread mix) (or other GF baking mix w/baking powder)
4 tbsp. (packed) pure dark brown cane sugar
1 large egg
3 Tbsp. milk of your choice
2 Tbsp. mashed banana
1 Tbsp. organic extra virgin coconut oil (warmed past room temp to get liquid state)
1/2 tsp. pure vanilla extract

Grease inside of large microwaveable mug and mix all ingredients very well with a fork. Microwave 1 minute and 30 seconds. (It will look like it it is overflowing but if you use a large mug it shouldn't. It will shrink back once cooling.) Let cool several minutes.

Enjoy!


My daughter also made another beautiful Bendaroosproject that I had to add to the photos because the colors went together so well. She made a lovely flower - and had no idea when making it that the colors were actually similar to a real banana flower.


I hope you are finding beauty in your day.

Why I'm sharing this: http://mamameglutenfree.blogspot.com/2012/02/beauty-in-eye-of-beholder.html

LinkWithin

Related Posts Plugin for WordPress, Blogger...