

In honor of Celiac Awareness Month (I know it's the end of the month, but I did mention it in this savory scones recipe!) and summer vacations upon us, I thought I'd take on a subject I was thrown into with full force months after going gluten-free: Leaving the safety of your gluten-free home for an extended time.


My brother was getting married in California wine country about six months after we had to switch to a gluten-free lifestyle.


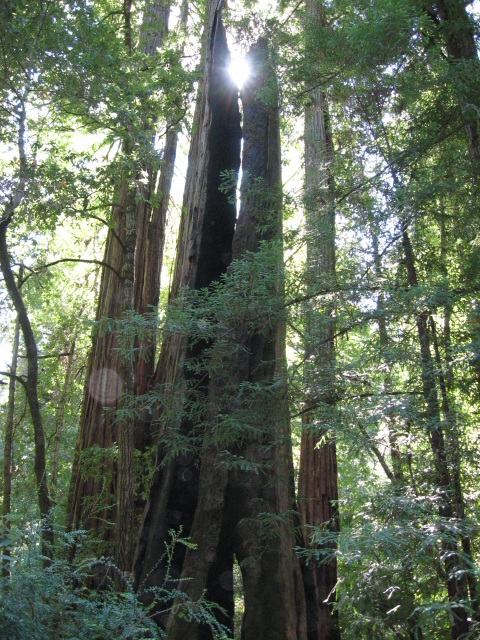
It was a vacation we were excited about - beautiful wine country and a chance for the girls to see redwood trees and the Pacific Ocean.


In order for us to make a great vacation out of it, however, and pay for hotels, food, etc., we weren't going to pay for four plane tickets. Driving was the only solution - two days of driving at least 16 hours a day on the way there and back. Four days, driving through desert and, with the exception of Phoenix and Los Angeles, having only smaller towns with McDonald's and other lovely fast-food chains catering to our gluten-free needs until we reached our multiple destinations. What were we to do?

The first thing I realized was that we'd need to rent a vehicle for the trip. My husband's four-door pickup truck and my Corolla had served us well (and possibly a little cramped) for many a 12-16-hour long trip with young children but weren't going to give us the room we needed for this kind of trip and all of the gear we needed in the vehicle with us.


A minivan it was. The kids loved it, and while I've sworn I won't drive a minivan even though I have many friends who love them (I'm a die-hard literal soccer mom but have felt I didn't need the vehicle to prove it!), I felt myself giving in just a little on that trip. It was pretty nice to have all that room. Maybe one day (or at least a crossover) - for now, I'm still in my Corolla.

The second thing I did was purchase a "refrigerator" (they come in different sizes -that's the one we got) and "oven"
  for the vehicle. We weren't going to have places we could stop for food, so we were going to bring our meals with us. I also made sure I had an AC/DC adaptor so I could use the refrigerator in hotel rooms if I needed to. The oven blew the fuse every time I tried, so I don't recommend doing that, which brings me to the third thing:
Hotels. My requirements for hotels have gone up since having children. They MUST be clean. And comfortable. Have good beds. And a reasonable amount of peaceful quiet.


Now that we are gluten-free, it's a big help if we also have hotels with refrigerators and microwaves at the very least. Some hotels have full kitchenettes. You pay a little more for your hotel, but you save some in food this way by fixing/heating up some yourself instead of eating out for every meal, since the complimentary breakfast buffet - if your hotel offers one - is likely not to have much more than fruit, orange juice and milk that you can feel comfortable isn't cross-contaminated.


The fourth thing I did was research (both in gluten-free guides and online) what restaurants were gluten-free friendly in the cities we'd be staying in and/or traveling through. If they had a gluten-free menu, I printed it out and stuck it in my ever-expanding categorized binder (which also contained important reservation papers, aquarium tickets, road maps and google directions in case our GPS technology failed, tourism information, etc.).

I promise I am not this organized in every area of my life. I was pretty darn impressed with myself, but it was worth it to have all that on hand. I printed the menus so we could study them ahead of time and, if need be, order pickup and/or delivery since we were going to have two tired children on our hands. Also, dining cards, restaurant guides and grocery guides like the ones from Triumph Dining are good to have on hand, as well as mobile apps like the one from Cook It Allergy Free if you're grocery shopping on the go.


The fifth thing I did was get the food ready. I prepared some meals in advance such as baked chicken, already cut into bite-sized pieces, and jambalaya (and I'm just realizing I don't have either of these recipes posted yet) and then vacuum-sealed them into individual portions and stuck them in the deep freezer. I did the same for waffles and banana bread, just didn't vacuum-seal them. I purchased things like individual applesauce cups, dried fruit, fresh apples and grapes, baby carrots and gluten-free high-fiber snack bars. I made some cookies and snack bars. Along with some other snacks, I also purchased a couple of boxes of dry cereal for the hotel rooms, just in case. I also bought a couple of Amy's gluten-free frozen meals. I stocked our little "refrigerator" with all the cold and frozen food, grapes, carrots, small bottles of orange juice and milk, as well as a few bottles of caffeinated beverages for my husband and myself. And lots of water. I also purchased some boxes of gluten-free "meals" (it's mostly snack stuff, but you get variety) from GoPicnic.

Once we got to California, we found some fantastic roadside fruit and vegetable stands that supplied us with some of the best fresh produce we've ever eaten. We certainly stocked up for our next hotel room stop.
The sixth probably goes without saying, but plenty of dvds, activity books, wipes, hand wipes, paper plates, bowls, napkins, paper towels, utensils and aluminum foil were also purchased. Don't forget toilet paper, plastic sacks and a good travel potty if you have young children. In this case, we were looking at hundreds of miles between rest stops of any kind.
We ate well on our trip. About an hour before we were going to eat, I'd pick a meal, wrap each meal (remove from any vacuum-seal packaging or plastic) in aluminum foil, stick it in our "oven" and plug it in. A good tip is to rotate the packets through heating time to evenly distribute the heating. Depending on what you are heating, you may have to do two at a time.

When we stopped in a city where we could eat out, we'd order extra and bring the leftovers with us. I'd wrap them up, keep them cold and then reheat on the road or in our room. We enjoyed leftover gluten-free pizza from a few nights before in Arizona under redwood trees in California.


We loved our trip, and while we haven't taken such long distance vacations since (though we certainly will at some point), we have taken trips that required at least 8 hours of driving several times since then. I've also discovered Glutenfreeda's frozen vegetarian bean and cheese burritos since then. They are SO good. I keep them cold until about an hour before we'll eat, then remove from packaging, wrap in aluminum foil and heat them in our handy "oven," which fits nicely in the truck and Corolla. We eat them with forks this way, because they'll fall apart if you pick them up.

My husband has a recently-discovered love of St. Dalfour's salmon meals , which Amazon provides with subscribe and save. Not only does provide him with a quick meal on the go, he keeps a few at the office for busy days when it's difficult for him to take a real lunch break. We want to try the bean one
 , too. We've also discovered Perfect Foods bars since then, and Rocky Mountain Organic beef snacks, both of which serve as high-protein quick snacks for the road that you can feel good about eating.

Traveling internationally? I've read many accounts of so many countries that are friendly for gluten-free travelers. As a matter of fact, some of the best packaged gluten-free products we've tried are manufactured in countries like Italy.
We'll be taking plenty of trips this summer, and I hope you will, too.


Make some memories.


Don't let your gluten-free lifestyle inhibit you from going where you want to - it doesn't have to. Do your research, stock up what you need, and you're good to go. Have fun! (See note below - I want you to share your tips!)


What are your gluten-free traveling tips? Have a favorite destination/restaurant/hotel? An online gluten-free travel resource? Tell us about it in the comments below so others can use it as a resource!
Hotels. My requirements for hotels have gone up since having children. They MUST be clean. And comfortable. Have good beds. And a reasonable amount of peaceful quiet.


Now that we are gluten-free, it's a big help if we also have hotels with refrigerators and microwaves at the very least. Some hotels have full kitchenettes. You pay a little more for your hotel, but you save some in food this way by fixing/heating up some yourself instead of eating out for every meal, since the complimentary breakfast buffet - if your hotel offers one - is likely not to have much more than fruit, orange juice and milk that you can feel comfortable isn't cross-contaminated.


The fourth thing I did was research (both in gluten-free guides and online) what restaurants were gluten-free friendly in the cities we'd be staying in and/or traveling through. If they had a gluten-free menu, I printed it out and stuck it in my ever-expanding categorized binder (which also contained important reservation papers, aquarium tickets, road maps and google directions in case our GPS technology failed, tourism information, etc.).


I promise I am not this organized in every area of my life. I was pretty darn impressed with myself, but it was worth it to have all that on hand. I printed the menus so we could study them ahead of time and, if need be, order pickup and/or delivery since we were going to have two tired children on our hands. Also, dining cards, restaurant guides and grocery guides like the ones from Triumph Dining are good to have on hand, as well as mobile apps like the one from Cook It Allergy Free if you're grocery shopping on the go.


The fifth thing I did was get the food ready. I prepared some meals in advance such as baked chicken, already cut into bite-sized pieces, and jambalaya (and I'm just realizing I don't have either of these recipes posted yet) and then vacuum-sealed them into individual portions and stuck them in the deep freezer. I did the same for waffles and banana bread, just didn't vacuum-seal them. I purchased things like individual applesauce cups, dried fruit, fresh apples and grapes, baby carrots and gluten-free high-fiber snack bars. I made some cookies and snack bars. Along with some other snacks, I also purchased a couple of boxes of dry cereal for the hotel rooms, just in case. I also bought a couple of Amy's gluten-free frozen meals. I stocked our little "refrigerator" with all the cold and frozen food, grapes, carrots, small bottles of orange juice and milk, as well as a few bottles of caffeinated beverages for my husband and myself. And lots of water. I also purchased some boxes of gluten-free "meals" (it's mostly snack stuff, but you get variety) from GoPicnic.

Once we got to California, we found some fantastic roadside fruit and vegetable stands that supplied us with some of the best fresh produce we've ever eaten. We certainly stocked up for our next hotel room stop.
The sixth probably goes without saying, but plenty of dvds, activity books, wipes, hand wipes, paper plates, bowls, napkins, paper towels, utensils and aluminum foil were also purchased. Don't forget toilet paper, plastic sacks and a good travel potty if you have young children. In this case, we were looking at hundreds of miles between rest stops of any kind.
We ate well on our trip. About an hour before we were going to eat, I'd pick a meal, wrap each meal (remove from any vacuum-seal packaging or plastic) in aluminum foil, stick it in our "oven" and plug it in. A good tip is to rotate the packets through heating time to evenly distribute the heating. Depending on what you are heating, you may have to do two at a time.

When we stopped in a city where we could eat out, we'd order extra and bring the leftovers with us. I'd wrap them up, keep them cold and then reheat on the road or in our room. We enjoyed leftover gluten-free pizza from a few nights before in Arizona under redwood trees in California.


We loved our trip, and while we haven't taken such long distance vacations since (though we certainly will at some point), we have taken trips that required at least 8 hours of driving several times since then. I've also discovered Glutenfreeda's frozen vegetarian bean and cheese burritos since then. They are SO good. I keep them cold until about an hour before we'll eat, then remove from packaging, wrap in aluminum foil and heat them in our handy "oven," which fits nicely in the truck and Corolla. We eat them with forks this way, because they'll fall apart if you pick them up.

My husband has a recently-discovered love of St. Dalfour's salmon meals

Traveling internationally? I've read many accounts of so many countries that are friendly for gluten-free travelers. As a matter of fact, some of the best packaged gluten-free products we've tried are manufactured in countries like Italy.
 |
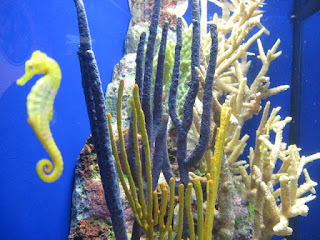
| See the sea lion? They were all over the place right in front of our room. |


Make some memories.


Don't let your gluten-free lifestyle inhibit you from going where you want to - it doesn't have to. Do your research, stock up what you need, and you're good to go. Have fun! (See note below - I want you to share your tips!)


What are your gluten-free traveling tips? Have a favorite destination/restaurant/hotel? An online gluten-free travel resource? Tell us about it in the comments below so others can use it as a resource!


