Monday, October 31, 2011

Pumpkin Apple White Chocolate Chip Brownies


I can't believe I almost let October pass without posting a pumpkin recipe! These brownies will be equally tasty in November, or December - or anytime.

The recipe is inspired by the apple brownies recipe in Cooking Down East by Marjorie Standish. Bake up a batch for your trick-or-treaters to enjoy today, and be safe out there! This post is also linking up to two delicious recipe parties for the season. Check out the details at the end of this post.


Projected prep time: 15 minutes; Bake time: 40 minutes
(Printable Recipe)

1/4 cup salted butter (1/2 stick)
1 cup organic pure cane sugar
1 egg
3/4 cup pumpkin puree
1 cup green apple, peeled and chopped fine (1 good sized apple is about a cup)
1/2 cup chopped pecans (optional)
1/2 cup, rounded (61 g or 2 1/8 oz.) millet flour
1/2 cup (67 g or 2 3/8 oz.) brown rice flour
1/4 cup (35 g or 1 1/4 oz.) sweet rice flour
1/2 level tsp. baking powder
Scant 1/2 tsp. baking soda
1/4 tsp. kosher salt
1/2 tsp. ground cinnamon
1/2 cup gluten-free white chocolate chips

Preheat oven to 350 degrees and grease a 7x11-inch pan.

Cream butter and add sugar gradually, then add pumpkin and mix well, scraping if necessary.

Beat egg into mixture until creamy.

Mix in chopped pecans if using, then apples.

Sift flour together with baking powder, soda, salt and cinnamon. Mix into pumpkin/apple mixture.

Fold white chocolate chips and pour mixture into pan.

Bake at 350 degrees for 40 minutes.

Place pan on wire rack to cool. These brownies taste best when completely cooled.

Enjoy!


And to add to the festivities today and the upcoming season, I'm linking this post up to two delicious recipe parties! T.R. over at No One Likes Crumbley Cookies is hosting a pumpkin party blog hop #pumpkinparty and EA Stewart over at The Spicy RD is hosting #applelove recipes. Be sure to go check out the delicious recipes that T.R., EA and all of the other participants have posted. You're sure to find more than one in each party to satisfy every loved one this harvest season!

Sunday, October 30, 2011

Cinnamon Raisin Yeast Bread


There's nothing quite like enjoying a slice of fresh cinnamon raisin yeast bread slathered with butter, toasted or not. Even better: A slice made into cinnamon toast topped with broiled butter, cinnamon and sugar. Especially on a cold fall day.

I can honestly say this is one of the best, if not the best, gluten-free cinnamon raisin breads I've ever eaten. My family agrees. I hope you enjoy it as much as we have!


I fully intended to share this with you last week, after sharing the parent recipe for this bread - the regular yeast bread - in the prior post. Last week ended up being one of the busiest I'd had in a long time (and that's saying a lot since I've had some very busy days so far this school year!) - on top of finding out that I had a reactivated case of the horrid mono of my teens. No wonder I've been so exhausted lately! (And I'm supposed to get as much rest as possible with these busy kiddos of mine - ha!) So every time I finally had a spare moment to sit down to edit the very few photos I had of this lovely bread, I felt like I would fall asleep. I was determined to get it to you today, though.


For photos of the recipe steps in this bread, you can look at the ones in the other yeast bread post. They are pretty much the same.


Projected prep time: 15 minutes; Rise time: 45 minutes; Bake time: 55 minutes
(Printable Recipe)


2 cups (298 g or 10.5 oz.) Pamela's bread mix and flour blend (NOT baking & pancake mix)
2 1/2 tsp. active dry yeast
1 1/4 cups (10 oz.) milk
1/2 cup (4 oz.) salted butter, cut in small pieces
1/4 tsp. kosher salt
1/4 cup organic pure cane sugar
1 egg
1 cup (137 g or 4 7/8 oz.) 
brown rice flour
1/3 cup (41 g or 1 1/2 oz.) millet flour
2 or 3 tsp. ground cinnamon
3/4 cup whole seedless raisins
Hot water


Place raisins in bowl and cover with hot water. Let sit.


Combine Pamela's bread flour with yeast in a large mixing bowl and set aside.


In a smaller bowl, combine brown rice flour and millet flour with the cinnamon.


Pour milk into a saucepan and add butter pieces, sugar and salt. Heat on medium until butter is melted and the temperature is 115 degrees.


Pour warm milk mixture over Pamela's flour and yeast, and beat with a wooden spoon several seconds until blended. Add egg and beat until incorporated. Place dough hook on mixer and beat at high speed for about two minutes. If you don't have a stand mixer, you can do this with a wooden spoon.


With mixer running at low speed, gradually add the remaining flours. Gradually increase speed as the flour combines until you can beat at medium-high without flour going out of the bowl. Beat for a minute and then scrape bowl with wooden spoon, then return to medium-high speed until everything is incorporated, about 30 seconds.


Drain raisins and fold into dough, incorporating all throughout.


Transfer dough to a ceramic or glass bowl and cover with a damp cloth. Place in warm spot for 45 minutes. (I use my oven for this. I turn it to about 100 degrees and then turn it off before I start making the dough, and it's just right when I'm ready to let the dough rise.)


After 45 minutes, dough should be about double in size. (If you are looking at the photos on the regular yeast bread post, just imagine raisins in the dough.)


Heat oven to 375 degrees and grease a loaf pan. Stir dough once and then transfer to greased loaf pan. Wet your fingers and smooth out any bumps on the dough surface. Let it sit on the counter and rise again while the oven is heating.


Bake for 55 minutes or until bread is done. Immediately after pulling it out of the oven, I like to butter the top.


Let it cool in the pan on a wire rack, or out of the pan. I've found it doesn't make much difference so I keep it in the pan.


This bread will keep for a few days at room temperature, but I've found it's better if I freeze some right away for use later in the week. To do this, I wait until the bread is completely cooled and then slice it with a bread knife and place all the slices together in wax paper, then place it in a freezer ziploc and freeze it until I need it. It still tastes fresh after being defrosted.


Enjoy! I'll be making another loaf this week so we have more to enjoy on these cooler days. :)


Wednesday, October 19, 2011

Yeast Bread (Perfect for Sandwiches)


There's something about the smell of yeast bread rising, and then baking, that is comforting to me. I always used to love that smell when I'd walk into a bakery, and I loved how it filled my house when I made it. Now, that smell doesn't have the same affect on me when I know it's something that can make me sick. This bread, however, we can eat. And it has the same smell that fills the house and lets everyone know that a hot slice slathered with butter is within reach in just a little while.


I have missed making a good loaf of yeast bread and have tried many times to make bread using my old recipes that you have to knead, experimenting with flours and liquid proportions etc. etc. to no avail. They were usually edible and even tasty, but weren't worthy of a sandwich.

The recipe for this bread is inspired by the same recipe I used to use often when I was growing up. It's easy, doesn't take too long AND it doesn't require kneading. I remembered this recipe recently, from that good old Better Homes and Gardens New Junior Cookbook that I was given so many years ago by my grandparents. After tweaking it several times over, I'm proud to offer you this bread and hope you enjoy it as much as my family does.


My children don't want any other bread for their sandwiches now, and while I do miss the Udi's multi-grain bread, I don't miss the cost. Buying a loaf that lasts for three days' lunches for two children at nearly $7 a loaf (that's what it costs where I live, anyway) adds up. Sure, gluten-free flours are costly as well and you are using a lot in bread, but I figured that I'm coming out ahead when each of these loaves will last through an entire week of sandwiches for both children and leaving a few slices extra for my husband and me. (Also take into consideration the savings when buying ingredients in bulk that you use often through the subscribe and save program on amazon.)

Projected prep time: 15 minutes; Rise time: 45 minutes; Bake time: 55 minutes
(Printable Recipe)

2 cups (298 g or 10.5 oz.) Pamela's bread mix and flour blend (NOT baking & pancake mix)
2 1/2 tsp. active dry yeast
1 1/4 cups (10 oz.) milk
1/2 cup (4 oz.) salted butter, cut in small pieces
1/4 tsp. kosher salt
1/2 tsp. organic pure cane sugar
1 egg
1 cup (137 g or 4 7/8 oz.) brown rice flour
*1/4 cup (29 g or 1 oz.) millet flour
OR
*1/4 cup (33 g or 1 1/8 oz.) teff flour

Combine Pamela's bread flour with yeast in a large mixing bowl and set aside.


In a smaller bowl, combine brown rice flour and millet flour, or teff flour if you prefer to use that over millet (I think I like the millet a little better in this bread), and set aside.


Pour milk into a saucepan and add butter pieces, sugar and salt. Heat on medium until butter is melted and the temperature is 115 degrees.


Pour warm milk mixture over Pamela's flour and yeast, and beat with a wooden spoon several seconds until blended. Add egg and beat until incorporated. Place dough hook on mixer and beat at high speed for about two minutes. If you don't have a stand mixer, you can do this with a wooden spoon.

With mixer running at low speed, gradually add the remaining flours. Gradually increase speed as the flour combines until you can beat at medium-high without flour going out of the bowl. Beat for a minute and then scrape bowl with wooden spoon, then return to medium-high speed until everything is incorporated, about 30 seconds.


Transfer dough to a ceramic or glass bowl and cover with a damp cloth. Place in warm spot for 45 minutes. (I use my oven for this. I turn it to about 100 degrees and then turn it off before I start making the dough, and it's just right when I'm ready to let the dough rise.)


After 45 minutes, dough should be about double in size.


Heat oven to 375 degrees and grease a loaf pan. Stir dough once and then transfer to greased loaf pan. Wet your fingers and smooth out any bumps on the dough surface. Let it sit on the counter and rise again while the oven is heating.

Smooth out the bumps or the top will look like the loaf pictured baked below.

Bake for 55 minutes or until bread is done. Immediately after pulling it out of the oven, I like to butter the top.

I didn't smooth the bumps out on this loaf, so the surface is uneven.
Let it cool in the pan on a wire rack, or out of the pan. I've found it doesn't make much difference so I keep it in the pan.

This bread will keep for a few days at room temperature, but I've found it's better if I freeze some right away for use later in the week. To do this, I wait until the bread is completely cooled and then slice it with a bread knife and place all the slices together in wax paper, then place it in a freezer ziploc and freeze it until I need it. It still tastes fresh after being defrosted.


Enjoy!

Friday, October 14, 2011

Thoughtless Words Can Cut Too Deep: Remembering Pregnancy and Infant Loss


In honor of Pregnancy and Infant Loss Remembrance Day tomorrow, Oct. 15, I thought I'd share with you a column I wrote many years ago while I was still working as a newspaper reporter.

I'll preface the column with telling you that since it was written, I have happily been blessed with two healthy, very spirited and adventurous daughters. And unfortunately have also had two more miscarriages, earlier in pregnancy than our first. The loss of our first child, discovering pregnancy complications with our second pregnancy (oldest daughter) and the incredible stress I worked under as a reporter all led me to quit my job and begin the very full life I have now.

I'm happy with the life I have and wouldn't trade my precious girls for anything. But I will always mourn the loss of my three other babies. The ache has lessened, but will always remain. I ultimately sought professional therapy to help me get back on my feet. If you are struggling for a very long time after a loss (each person is different in how long they need to complete the grief process - there is no right or wrong time frame), please don't discount this. A good, compassionate counselor can do a world of good in helping to cope with grief.

After this column ran, I was contacted by many individuals expressing their thanks. Many had never lost a child, but said they felt the same way about losing other loved ones. Many of the same words apply. I hope it touches those of you who have experienced this loss, and those of you who haven't. I especially hope it touches those of you who haven't, and it gives you a greater understanding of loss.


I’m prefacing what I am about to say with the fact that this is a column I never imagined I would write for the newspaper.

But it’s come to a point that I feel I need to write this.

I’m not writing this for pity because that’s the last thing I want. I’m writing this so some of you will think before opening your mouth, in hopes that I can save someone else the pain that has been inflicted on me so often without the person realizing it … thinking they are helping.

Many of you know, but even more of you don’t, that my husband and I lost a baby in December, two weeks before Christmas. It was our first pregnancy and I was in the beginning of my second trimester. It’s the worst thing that has ever has ever happened to me, and while the pain gets easier to handle, I know our loss will always be with us. I’ll forever be thinking of my baby in heaven, even if we are blessed with other babies.

This isn’t about all the hurtful things people said to me, being sincere and trying to say something that would make me feel better … “It’s going to be Okay” … “It was God’s will” … “Maybe there was something wrong with the baby” … “It’s not that bad” … “At least you lost the baby now instead of later” … and on and on and on.

While I know [God allowed it to happen], that’s something I had to realize on my own. While I knew in my mind that it was going to be Okay eventually, I didn’t feel like it would be Okay at the time. And it’s not Okay. My baby is gone.

And it doesn’t matter how far along someone is in her pregnancy, when she loses her baby, most of the time it’s going to be an unbearable pain that she suffers for a long time.

If you know someone this has happened to, please don’t ignore her pain, or the father’s, because you don’t know what to say or you’re uncomfortable – because it’s a real loss that needs recognition.

But please just say you’re sorry.

That you’re there to lend an ear or a hug if they want you to. You’re praying for them, thinking of them. Cry with them if you want to. But leave it at that, unless you really know what you’re talking about.

If you don’t, I can promise that more than 85 percent of the time it’s going to hurt that person more than help them.

I know people only had good intentions when they said insensitive things to me and don’t harbor bad feelings, but it really hurt.

But this isn’t about that. It’s about comments that are made, most of the time with good intentions, to someone that probably isn’t pregnant at the time.

“Isn’t it about time you had a baby?” … “Why don’t you have a baby yet?” … “Why don’t you have children?” … “You need to hurry up and catch up with the rest of us.”

Or the comments that are made if someone has gained weight but aren’t pregnant … “When’s the due date?” … “Congratulations! So when are you due?” … “I didn’t know you were pregnant!” … “Are you pregnant?”

Not that it’s anybody’s business.

I know these are usually meant to be harmless, friendly comments and inquiries. But the fact is, you don’t know what that person has been going through.

Please pay attention to this so others aren’t hurt.

How do you know you aren’t asking someone, as in my case, who recently lost a baby? Or who has been trying to have one but can’t? And if she’s not in these categories, she’s probably going to get ticked off that you’re asking a question that is personal and quite frankly none of your business.

I was in that last category for quite a while after my marriage, especially after I put on a few extra “happy pounds.”

I know all I have just said may seem somewhat harsh to some of you, but that’s not my intention. I’m not reprimanding or looking for apologies.

I just want to make people aware of a very real problem, in order to hopefully aid in someone else’s grief.

My heart goes out to all of you who suffer this pain and my prayers are with all families who experience a loss such as this. God bless you.


If you're wondering what else you can do other than the things I describe above, perhaps some food brought in their time of need would be appreciated. Casseroles like my shrimp casserole or chicken enchilada casserole (just realized to my dismay this recipe is not posted as I thought it was - will have to share sometime!) are always a favorite of mine to bring to others in times of grief or in times of happiness. Both are comforting and delicious, and can easily be refrigerated or frozen until it's needed if the person isn't able to eat it right away.

Friday, October 7, 2011

Oatmeal Cream Pies


My children have never eaten a Little Debbie oatmeal creme pie. (I don't think they are missing much.) Come to think of it, I really don't think they ever tasted that great to me. They were just a novelty for me - until I was buying food for myself - because they had that creamy filling.

These? These are good.


They came about as an accident the other day when I was trying to come up with a better oatmeal raisin cookie recipe. (This particular recipe was inspired by the one Marjorie Standish provides in Keep Cooking the Maine Way.) These won in the taste department, but failed in the texture department. I wanted a good, stout yet soft, chewy cookie that was much thicker. These came out on the thinner side and are incredibly soft. They are nice and flat, and perfect to make those cream pies with.


I'm still working on getting the oatmeal raisin cookie to a texture perfection I prefer, but these will satisfy in the "incredibly tasty" department for now.


Projected cookie prep time: 15 minutes; Projected bake time: 7-10 minutes; Projected pie prep time: Under 5 minutes
(Printable Recipe)

1 stick unsalted butter
1 stick salted butter
1/2 cup organic pure cane sugar
1 cup packed pure dark brown cane sugar
2 eggs
1 tsp. pure vanilla
1 1/2 cups Pamela's bread mix and flour blend (not baking mix)
1 scant tsp. baking soda
1 tsp. cinnamon
1 1/2 cups certified gluten-free rolled oats
1/2 cup raisins (optional)

Filling:
Marshmallow creme or fluff

Preheat oven to 350 degrees.

Cream butter, add vanilla.

Gradually add sugar a little at a time, while mixing.

Add egg and beat until light and creamy.

Mix flour together with soda and cinnamon, beat into butter mixture.

Fold in oats, then raisins.

Bake at 350 degrees on ungreased cookie sheets for 7-10 minutes. Cool on wire rack.

For pies, spread a spoonful of marshmallow creme or marshmallow fluff onto the bottom of one cooled cookie, and sandwich the bottom of another cookie on top.


Enjoy!


Wednesday, October 5, 2011

Pizza By Ratio

Pizza with bell peppers (under cheese), artichoke hearts and caramelized onions
I guess I'm in a pizza kind of mood lately. I just realized my last post was a pizza post, making two pizza posts in September. You can't ever get enough pizza, right?

When I found out we were doing pizza crust for our Gluten-Free Ratio Rally this month, I was tempted to try and figure out the ratio for my go-to pizza crust. It's tried and true (and edited many times over!!), and I love it because it reminds me of family nights growing up. I decided against it, however, and pushed myself again. (But I did use some of the same flours.) If you're looking for a great-tasting, whole-grain gluten-free pizza crust to top however you wish, this pizza will deliver.

I love these rally challenges. They make me a better gluten-free cook/baker and prove nearly anything is possible in a gluten-free kitchen.


Logo designed by Anile Prakash

A big thank-you goes to Karen over at Cooking Gluten-Free!, our host for this month's rally challenge, for hosting us this month. Be sure to check out Karen's crust ratio recipe for garlic, artichoke, sun-dried tomato, pesto pizza (Oh. Yum.) and all the other delicious ratio pizza recipes from the participants this month. She has the links on her post, and there is something for every taste there.

If you're unfamiliar with the ratio rally, check out my rally page, where I have all my other rally posts which link to each monthly host, as well as Shauna's post on Gluten-Free Girl and The Chef, which was the very first rally post.

I decided to keep it simple this time around and let you choose your own toppings. I'll list some of my favorites to get you started, but this post is about the crust. It's filled with healthy whole-grain goodness and taste, and both daughters and my husband loved it. This crust has the right amount of crunch on the edges and bottom, and the right amount of soft, chewy bread for the rest. It doesn't fall apart when you pick it up, so you can eat the entire thing with your hands. It also still tastes great reheated in the oven or microwave.


I used Ruhlman's ratio for basic bread dough for this pizza crust: 5 parts flour: 3 parts water (plus yeast and salt), or 5 oz. flour: 3 oz. water. His basic recipe makes two crusts (20 oz. flour, 12 oz. water), but this particular recipe will make one pizza at least 12 inches across. I halved the recipe while I was experimenting with the ratio, so I wouldn't waste too many ingredients if things didn't turn out right, and thought it might be a good idea to keep it that way for those of you who aren't feeding a crowd. If you want more pizza crust, simply double, triple etc. to your heart's desire.

Projected prep time: 15 minutes; Rise time: 1 hour; Projected bake time: Total of 25-30 minutes
(Printable Recipe)

3 oz. (83 grams) tapioca starch (flour)
1 oz. (28 grams) potato starch (not potato flour)
*2 oz. (56 grams) sorghum flour (*see note below)
2 oz. (56 grams) amaranth flour
2 oz. (56 grams) teff flour
1 tsp. kosher salt
5 oz. very warm water (a tad less than 2/3 cup)
1/4 tsp. sugar
1 tsp. active dry yeast
1 oz. water (2 tbsp.)
1 tbsp. milled flax seed
1 tbsp. (1/2 oz.) extra virgin olive oil
Extra virgin olive oil, for brushing
Cornmeal (optional)
*OR replace the 2 oz. sorghum with 2 oz. (56 grams) millet flour (I preferred the crust with sorghum, husband liked the millet better. Both tasted great and not much difference.)
Toppings

Combine flours with salt.


In a small bowl, combine 2 tbsp. of water with the milled flax seed to create a slurry, then let it sit.


Mix sugar into warm water, then sprinkle yeast into water. (This isn't necessary, but I like to see that the yeast is doing its job before adding it to the flour.) Let sit for 10 minutes.


Pour olive oil into flour. Stir flax slurry (it should be much thicker at this point), pour into flour. Pour yeast and water into flour.

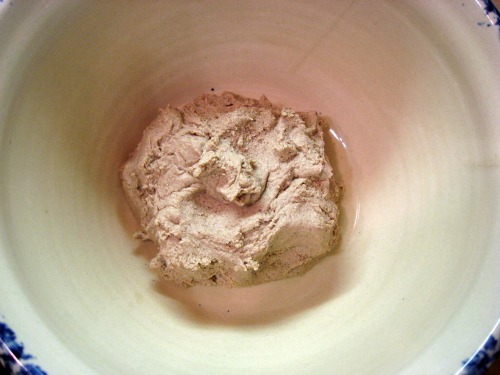
Mix with dough hook at low-medium speed until flours begin to combine, then scrape the bowl to make sure all the flours are incorporated (you may have to do this a few times - or you can start with the paddle, then scrape and switch to the dough hook.) If you don't have a stand mixer, you do all of this with a wooden spoon. Continue to mix ingredients until dough forms a ball. If you mix past this, it's okay - and may even be a little better, but the dough won't be a ball anymore. That window is very small, and I miss it many times when I'm not paying attention. It just makes it a little easier to get out of the bowl when it's still in a ball.

Transfer dough to a ceramic or glass bowl (not necessary, but I do this because I let it rise in my oven and my mixer bowl doesn't fit very well in there on the racks) and cover bowl with a damp clean cloth or dish towel. Move to a warm, draft-free spot and let it rise for an hour. (As I said above, I use my oven. I warm my oven to about 100 degrees about 10 minutes before I start the dough, then turn it off. By the time it's ready to rise, the oven is warm but not too warm. And as long as I don't need it for something else, it makes a great place to let the dough rise.)


After an hour, your dough should be about doubled in size. Preheat oven to 400 degrees. (Remove your dough first if you're using this spot to let it rise!)


Unless you're using a pizza stone (I don't use mine in any of these photos), rub a little olive oil onto the pan surface. If desired, sprinkle a tiny amount of cornmeal on top. (I usually do this.)

Roll or pat your dough out evenly onto the pan.


Brush with a light coating of olive oil, prick with a fork a few times. Bake for 10 minutes.

Top with desired sauce(s) and toppings (see some of my favorites below if you need ideas), then return to oven for 15 to 20 minutes, or until cheese (if you're using it) is melted and beginning to bubble.

Artichoke & caramelized onion
Turkey pepperoni & fresh onion
 Let sit for 5-10 minutes before cutting.

You can see that the crust holds up, even hot out of the oven, to bending and being held by hand:


*Just a sampling of some of my favorite toppings, in no particular order:
Pizza sauce, ricotta cheese, garlic, mozzarella, feta, spinach, artichoke, white onions, red onions, caramelized Vidalia onions (in butter & Tony Chachere's), green bell pepper, red bell pepper, jalapeno pepper, turkey pepperoni, pineapple, chicken and apple sausage, turkey sweet Italian sausage, mushrooms, olives, fresh tomatoes

Some of my favorite topping combinations:
-Tomato pizza sauce, diced green bell peppers directly on top of sauce, mozzarella cheese, turkey pepperoni, pineapple, fresh red onion
-Ricotta mixed with fresh garlic, topped with mozzarella, then topped with sauteed zucchini sticks, salt and pepper OR fresh spinach instead of zucchini, directly on top of ricotta and then mozzarella on top of spinach
-Tomato pizza sauce, jalapeno slices, caramelized onions and sweet turkey Italian sausage with mozzarella
-Tomato pizza sauce, feta cheese crumbles, mozzarella cheese, chicken and apple sausage and caramelized onions (my brother got me onto that one)
-Tomato pizza sauce, red or green bell pepper, artichoke hearts and (or not) caramelized onions

Enjoy with the toppings of your choice!


Don't forget to head on over to Karen's host post to see her amazing pizza and all the other fantastic recipes brought to you by rally participants this month! Thanks again, Karen!

LinkWithin

Related Posts Plugin for WordPress, Blogger...