Tuesday, August 9, 2011

Praying for a Fellow Food Blogger


I intended to give you a food post today, but I'm just not able to today. I learned yesterday that someone in the food blogging community was hurting. Though I don't know her personally, she is in my Twitter world and I know she is close to my age and also has two daughters. Jennifer Perillo (of In Jennie's Kitchen) is well-known in this community of food bloggers - an ever-expanding community I am fairly new to but love. We all come from different families, friends, political and religious beliefs but we are united in our passion for good food and sharing that passion. I enjoy learning more about these fellow food bloggers and reading about their kitchen adventures.

Jennifer lost her husband to a sudden heart attack the other night. Suddenly, he was gone. And with so much life left ahead of him. I have been heartbroken for her since finding out. She posted a video on her blog yesterday of her husband and one of their daughters dancing, and titled it "one last dance." It took my breath away and I cried for hours after watching it.

This isn't the first time I've learned of tragedy hitting someone I don't personally know through Twitter, Facebook or some other method. I've certainly read several blog posts from fellow bloggers that have made me grieve for their loss of a loved one, be it family or friend. I have cried for them and prayed for their peace and comfort. And certainly there are many losses all around us every day, from life in general or political unrest, or whatever the reason. Certainly there are many in my thoughts and prayers these days, who have lost so much. Life can be tragic. And life can be beautiful.

This time, though, it has rocked me on a deeper level. Perhaps because of the common traits I mention above, she and her family are in my constant prayers and thoughts. I keep wondering how I'd cope if I lost the love of my life, and keep remembering that life can be short - so enjoy it in the moment. Each moment.

Say what you want about technology taking the personal out of life - and it can be true - but it's been my experience that these little (or big) communities within something larger, like Twitter, reach out to each other when a need arises. Words of comfort and condolence are provided in a constant stream to those in need. Or joy and celebration when someone has happy news. So many more people are praying and thinking about Jennifer and her family now because of it. I've already read some beautiful blog posts about her loss that put into words what so many of us are thinking.

Please keep Jennifer and her family in your prayers and your thoughts right now. And give a big hug to each of your loved ones around you right now.

Wednesday, August 3, 2011

Fresh-Squeezed Lemon Cake


I have a lot of happy memories surrounding cake of all kinds, flavors and colors. I don't think that's necessarily because cake makes me happy, but mostly because I was eating cake during happy times. That said, however, let's face it: Cake makes me happy.


I love eating cake, I love decorating cake, I love the satisfaction of mixing and baking a cake and pulling it out of the oven and knowing that I did a good job, and that the cake cooperated with me to turn into a good cake. And did I mention I love eating cake?


But not just any cake. I don't like dry cakes. Not one bit. They have to be moist or at least not be dry and crumbly. I don't want to feel like it's drying my mouth out. I prefer dense cakes, but I also adore light, airy angel cakes. I like a tender crumb or a firm cake equally, as long as it isn't dry and it has great flavor. Almond is my favorite, but I also love nearly any other flavor including chocolate. I don't skimp on cake ingredients, either. Real butter and pure everything, please and thank you. (There is a difference between butter, shortening and lard in cakes, no matter what the lady behind the counter at a local grocery bakery said in her argument with me.)


So it's no wonder that I was excited when Kate from Gluten Free Gobsmacked - our host this month for the Gluten-Free Ratio Rally, said we were doing white or yellow cake for our theme. Check out her rally post where she gives her incredible cake ratio recipe and hosts all the other delicious recipes the other participants baked up this past month. (And thanks, Kate, for hosting us!)

Logo designed by Anile Prakash

Cake is also the reason I decided to give the ratio rally a try. Cake is the first thing I tried with weight baking (not ratio) - and it was the weight baking that made my favorite cake recipe finally come out perfectly while still being gluten-free - as I detail with many words and photos in this post about my beloved four-egg cake.

(If you want to read more about my reasons for joining up with the ratio rally, you can check out my peach poppy seed bread post here. I also have links to all the rally posts I've written in the recipe/subject index.)

I tried to get my four-egg cake to work out into a clear ratio because in my own opinion and that of many friends and family members, it is one of the best cakes ever. Sadly, however, it just didn't work out into a ratio that made much sense. 

I'm glad, though. I once again was forced to step out of my comfort zone and try something beyond my tried-and-true. The result was nothing short of mouth-watering delicious. The texture soaked up the flavor quite well, and it was the perfect amount of sweet and almost-puckering lemon. I make a lemonade cake that has a little different texture and frosting, and wanted to get a similar taste in a bit different cake this time.


For this cake, I used Michael Ruhlman's sponge cake ratio of 1:1:1:1 (1 part egg:1 part sugar: 1 part flour: 1 part butter - 8 ounces each in this recipe). That being said, I'm not sure if it was because of the gluten-free flours or the difference in mixing according to Ruhlman's instructions as opposed to what I'm used to for sponge cakes (Joy of Cooking), but this cake turned out much more like a butter cake, in my opinion, than a sponge cake. I'm used to sponge cakes (even my gluten-free ones) being much more light - almost like an angel cake with a yellow color and not as high. This cake was very firm and pretty dense. But it was a fantastic cake, nonetheless.


The next time I make it, I'll experiment with backing off an ounce or so of starch and replacing it with more brown rice flour, as well as using my preferred organic cane sugar rather than the refined pure cane sugar I used this time around. I think the flour change may make the cake have a little more tender crumb.
Projected prep time: 15 minutes; Projected bake time: 35 to 40 minutes
Cake:
8 oz. eggs (4 large eggs plus one yolk)
8 oz. pure cane sugar
1 tsp. kosher salt
2 tbsp. fresh-squeezed lemon juice
1/2 tbsp. fresh lemon zest
1 tsp. pure vanilla
2 tsp. baking powder
1 1/4 oz. almond flour (34 grams)
3 1/4 oz. brown rice flour (93 grams)
3/4 oz. sweet rice flour (20 grams)
1 1/4 oz. tapioca starch (35 grams)
1 1/4 oz. potato starch (37 grams)
1/2 oz. white rice flour (13 grams)
8 oz. (2 sticks) unsalted butter, melted but cooled to room temperature

Filling:
Lemon curd (homemade or store-bought, just make sure it's gluten-free)

Glaze:
3 1/2 cups powdered sugar
Fresh-squeezed lemon juice

Lemon peel curls and slices for garnish

Have all ingredients at room temperature.

Preheat oven to 350 degrees and line bottom of 9-inch round cake pan with parchment paper.

Combine your room-temperature eggs, sugar, salt, lemon juice and vanilla in large mixing bowl. Whisk at low-medium speed until the sugar begins to dissolve, 


then switch to high for about five to seven minutes, 


until the eggs have turned a light yellow color and have increased some in volume.


Sift your room-temperature flours together with the baking powder and carefully fold the flour mixture into the egg mixture until combined.


Fold room-temperature melted butter into the mixture and pour into lined pan.

Bake 35-40 minutes, until a toothpick inserted in the center comes out clean. I opened my oven at 25 minutes to check it and it was too soon, causing the cake to fall a little in the middle.


Place pan on a wire rack to cool for several minutes. 


When cooled enough to touch, run a knife around the edges and flip over onto the wire rack. Let it cool a few more minutes, then carefully slice the cake in half horizontally to make two layers.

Place the cake pan back over the layers, flip back over and cover with plastic wrap. Place in freezer until firm.

When cake has firmed up some, remove from freezer and place the first half on a cake plate, cut side up. 


Spread lemon curd over the entire surface, 


then place the remaining half on top, cut side down.


Prepare your glaze by mixing the powdered sugar with just enough fresh-squeezed lemon juice to make a glaze with a good spreading and drizzling consistency. You don't want it to be too thin, but not nearly as thick as a traditional frosting, either.

Spread glaze over the top and drizzle over the sides. Garnish with lemon peel curls and thin lemon slices. 


Allow glaze to set before cutting into cake.


If your family is anything like mine - and thankfully my mom was visiting to help out with the tasting, be prepared to have most of the cake eaten in one sitting. (I did help, too. Quite a bit.) They loved this cake and said it was almost as good as my four-egg cake, and it was so close it was almost hard to tell.


Enjoy!


Wednesday, July 27, 2011

Mango Salsa


I don't have any photos to do this salsa justice. I made it several weeks ago and took quick photos, then lost my best one (and forgot to take more photos the next two times I made it). But I can tell you it is SO. Incredibly. Good.

It tastes great with chips, but it tastes amazing with cheese quesadillas (we at them too fast to get photos). Add some spinach in those simple quesadillas and you have a quick meal that will make your mouth sing. Next time, I'm adding some shrimp to the cheese and spinach.

I slightly adapted this recipe from a card that came with my Harry & David fruit-of-the-month club one year with our honey mangoes. I've made this with honey mangoes, and with regular mangoes from the store. It's ridiculously easy.


Projected prep time: 15 minutes; Chill in refrigerator overnight
2 ripe mangoes, peeled and cubed
1 vine-ripe tomato, diced
5 or 6 yellow pear tomatoes, diced (if you have them - one thing I love about my summer garden!)
1 medium to large red onion, diced
1/2 green bell pepper, seeds removed and diced
1/2 red bell pepper, seeds removed and diced
1 jalapeƱo, seeds removed and diced (add more if your family likes spicy - mine doesn't)
Several generous shakes of dried cilantro (I'm one of those people who doesn't like it fresh)
Juice from 1/2 lime
Juice from 1/2 lemon
Kosher salt to taste

Combine all ingredients, drizzle with lime and lemon juice. Combine, then salt to taste. Refrigerate overnight or  several hours at the very minimum.


Enjoy!

Wednesday, July 20, 2011

Miss C's Raisin Oatmeal Muffins


It's pretty exciting for a child of any age to get the opportunity to help out in the kitchen, and it's exciting for everyone when that child comes up with a recipe all on her own and it comes out with huge success and everyone is more than delighted to eat every last crumb.

That's what happened for my 8-year-old this morning. She wanted to make muffins, but not just any muffins. "Raisin Oatmeal" muffins - all from her own recipe creation. She pretty much knew exactly what ingredients she wanted in these muffins and for the most part she knew the exact measurements of each ingredient. With very little help on a couple of ingredients and their proportions, Miss C's raisin oatmeal muffins came out perfect and delicious.

I hadn't even used oatmeal in gluten-free muffins yet, so it was a trial all the way around - and one I'm glad my daughter insisted on. As my mother, who is visiting at the moment, stated while she ate a muffin with her tea, "These are perfect dunking muffins!"


Projected prep time: 5-10 minutes; Projected bake time: 18 minutes
Makes 12 muffins
2 large eggs
1 cup milk
1/2 tsp. pure vanilla
2 1/4 cup Pamela's baking and pancake mix
1/2 cup organic cane sugar
1 tsp. cinnamon
1/2 cup certified gluten-free rolled oats
1/2 cup raisins

Preheat oven to 350 degrees. Line muffin tin with baking cups.

Mix dry ingredients together and then add liquid. Fold in raisins.

Hold bowl for little sister while she stirs the ingredients together.


Bake for about 16-18 minutes. Muffins are done when they spring back when touched, and a toothpick inserted in center comes out clean.

Eat them warm or at room temperature, but they are really good warm!


Enjoy!

Wednesday, July 13, 2011

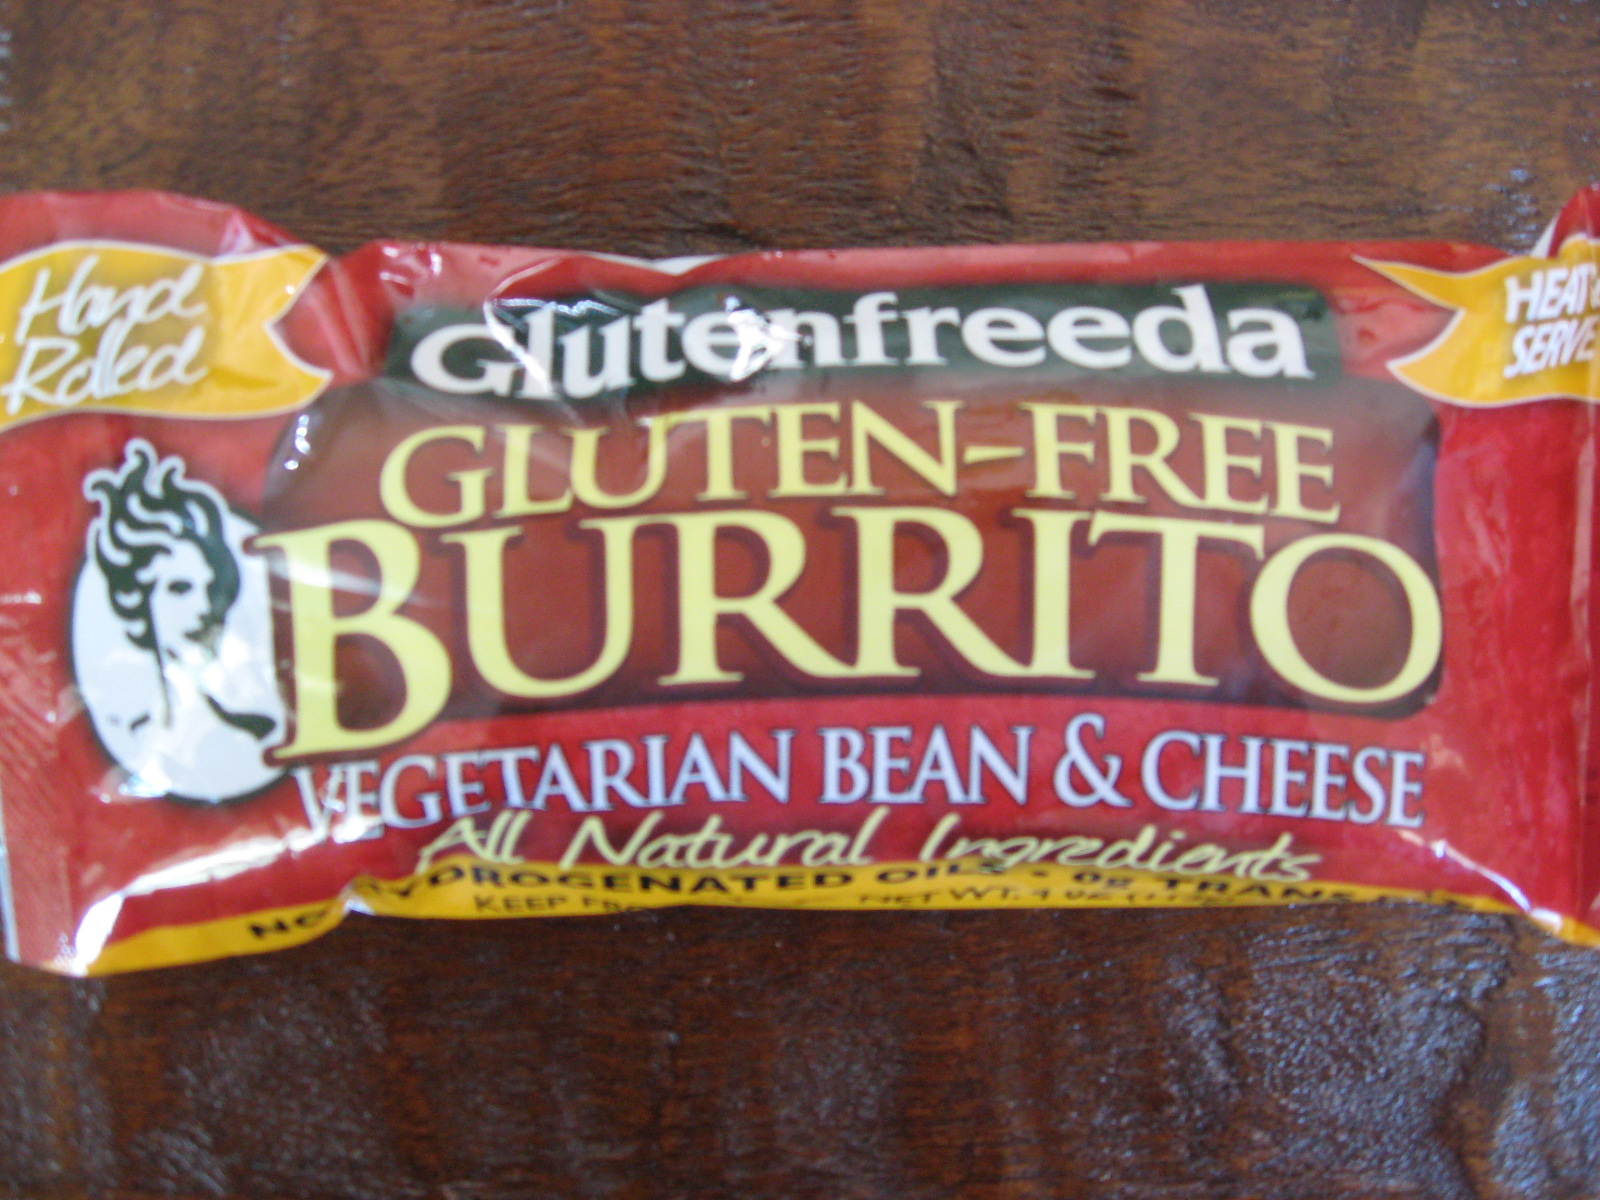
Product Highlight: Glutenfreeda Frozen Burritos


Sometimes you just need something that you can zap in a microwave really quick that still tastes good and you can feel pretty good about eating. This can be hard sometimes in the gluten-free world. You're at the office and can't really take a lunch break but you aren't able (thankfully!) to pick up anything at the nearby fast-food restaurant, but you have one of these at home a few blocks away - or better yet, you put one in the office freezer that morning, knowing you'd have a busy day. Or you've got a million and one things to do at home and have to leave in 10 minutes.

I've found the Glutenfreeda's frozen burritos to be a bit of a lifesaver at times. The vegetarian bean and cheese is my favorite - filled with beans, cheese and vegetables. I really think it's quite delicious when you're hungry and can't cook. (My husband really likes the chicken one.) I use them in our little oven when we take long road trips, too. Nothing like a hot meal in the middle of nowhere when you've been driving for hours!

They usually don't hold up too well and I recommend eating them with a fork, but if you like them as much as I do, you won't mind.

Wednesday, July 6, 2011

Multi-Grain Fettuccine


Fresh, homemade pasta is always a treat. It seems to taste even better not only because it is, but because you know that someone worked harder to make it for you.

I've always been impressed with homemade pasta, and was excited - and at the same time a little intimidated - by this month's Gluten-Free Ratio Rally challenge of homemade pasta. Jenn over at Jenn Cuisine is the host for our rally posts this month, so be sure to check out her rally post where she also lists the links to the recipes all the other food bloggers participating this month have posted. There are some really amazing dishes that you don't want to miss out on, including Jenn's tagliatelle with smoked salmon. Oh yum!

Logo designed by Anile Prakash
If you are interested in why I'm involved in this rally each month and what it's all about, check out my first rally post of peach poppy seed bread, where I explain my excitement and reasons for getting involved. I'm learning a lot and encourage you to give ratio baking a try - it gives you the freedom to make a reality nearly any food idea you have in your head. I have a list of the rally posts in their own category in the index.

I was in for some serious work with the homemade pasta challenge. Prior to a few weeks ago, I'd never attempted homemade pasta even with gluten. I'd always wanted to, but never did. And now I was going to make it gluten-free having no firsthand experience with the way it was "supposed" to be done.

I still have a long way to go before any kind of perfection, but I can safely say that I eventually turned out a great-tasting pasta with a good texture that didn't fall apart during or after cooking and didn't get mushy. The entire family agreed it was good stuff.

I learned three major things in this pasta-making challenge:
1. If you don't have a pasta roller, you can forget about your workout that day because you'll get a good one rolling your pasta.
2. It's most definitely worth the extra work
3. I need a pasta roller

You see, without a pasta roller I just couldn't get the pasta rolled quite thin enough to suit me. So you'll notice it's a little thick - though not nearly as thick as the first trial! I ultimately got the best luck rolling it between parchment paper, but it still didn't get as thin as I wanted it. It worked, though, and was definitely edible.


You may also notice that some of the pieces aren't very long. I got careless a few times during my rolling and let the paper bunch up a little and crease. When I tried to peel the pasta off the paper, sometimes it broke along the creased areas. Also, the dough wasn't rolled out in an even length, so I had some short sides.

I called this "fettuccine" but in reality some of the noodles are much wider and some much more narrow than that. (I need a pasta cutter, too!) I cut the noodles using a smaller pizza wheel, but I never have been good at straight lines. I honestly don't think I could draw one if I had a million bucks at stake. Bottom line is, it's pasta. You can cut it/shape it any way you choose. I thought about attempting a ravioli, but I decided I just wanted this to be simple. I needed this to be simple. 

And I wanted to get the true taste of the pasta, so I served it in a simple way without sauce. There will be plenty of time in the future for me to play around with more homemade pasta creations - starting with some of the recipes from my fellow rally bloggers. After I get a roller.

I used Michael Ruhlman's pasta dough ratio of 3 parts flour: 2 parts egg for this recipe (9 ounces flour: 6 ounces egg).

I'm not even going to attempt giving you a projected prep time for this because it's going to entirely depend on whether you have a pasta roller or are using a rolling pin, how familiar you are with making pasta and whether you have kids running through your kitchen, among other things. The cook time will also vary according to how thin you are able to roll your pasta, so I'll only give an estimate.

Multi-Grain Fettuccine
1 oz. tapioca starch (29 grams)
1 1/2 oz. teff flour (43 grams)
2 oz. sweet rice flour (57 grams)
4 1/2 oz. brown rice flour (128 grams)
6 oz. eggs (3 large eggs)
1/4 oz. extra virgin olive oil (6 grams, or 1/2 tbsp.)
1/2 oz. water (14 grams, or 1 tbsp.)

(The topping I used is simply some zucchini sliced into sticks and sauteed in some extra virgin olive oil and kosher salt, and seasoned with black pepper. I placed it on top of the pasta and topped the zucchini with grated parmesan. It was fantastic.)

Sift flours together in large bowl and make a well in the center. 


Add oil, water and eggs into the well and begin to incorporate the liquids into the flour. I used my stand mixer with the dough hook for most of this, but Ruhlman suggests using your fingers to do all the mixing. I did end up using my fingers and hands after most of the liquid was absorbed.


When the dough is at a good consistency, make a disk out of it, wrap it in plastic wrap and let it sit for about 15 minutes.


Cut into 4 equal pieces and roll dough out between two sheets of parchment paper or in a pasta roller as thin as you'd like it. Cut using a pastry cutter or small pizza wheel, or pasta machine.


Have ready a large pot of well-salted boiling water with some olive oil in it, and place pasta into boiling water. Cook until al dente or as tender as you'd like it. My cooking time varied between about 4 minutes to 9 minutes, and all of the pasta held up well.


Drain pasta when finished cooking and then toss with a little olive oil. Top with whatever you desire.


Enjoy!


And don't forget to check out all the other delicious homemade, gluten-free pasta recipes posted in Jenn's post! (And thank you, Jenn!)

Brooke from B & the Boy! made Ravioli w/strawberry filling and chocolate berry sauce
Caneel from Mama Me Gluten Free made Multi-grain fettuccine
Charissa from Zest Bakery made Linguini with smoked salmon and creamy vodka sauce 
Erin from The Sensitive Epicure made Ravioli w/ shrimp, spinach, mushrooms, & cheese filling in browned butter
Gretchen from Kumquat made Vegetable lasagna
Jenn from Jenn Cuisine made Tagliatelle with smoked salmon, peas and parmesan
Lisa from Gluten Free Canteen made Lokshen kugel
Karen from Cooking Gluten Free made Homemade gluten free pasta
Mary Fran from Frannycakes made Pasta with pink vodka sauce
Meaghan from The Wicked Good Vegan made Vegan gluten-free homemade pasta, in creamy artichoke tagliatelle
Meg from Gluten-Free Boulangerie made Fettuccine with sun-dried tomatoes
Pete and Kelli from No Gluten, No Problem made Tortellini
Shauna of Gluten Free Girl made Gluten free fresh pasta
Silvana from Silvana’s Kitchen made Lemon-poppy pasta with tomato, corn and basil
Tara from A Baking Life made Fazzoletti with wild mushrooms and spring onions
TR from No One Likes Crumbley Cookies made Tomato basil pork raviolis

LinkWithin

Related Posts Plugin for WordPress, Blogger...