Wednesday, April 20, 2011
Matzoh Ball Soup
I absolutely LOVE matzoh ball soup. I've adored it since I was a child, and don't know why I don't make it more often. If you are wanting some great charoset or matzoh crackers, check out yesterday's post.
These matzoh balls, just so you know, would taste great as dumplings for chicken and dumplings. They don't taste the same as the dumplings my mom made for chicken and dumplings, but she made the dumplings into balls rather than thinner squares like some do, so this recipe is what I'd start with if I was craving that dish.
I adapted this recipe from this gluten-free matzo balls recipe a couple of years ago, and we all love it.
Projected prep time: 10 minutes; Refrigerator time: 2 hour minimum; Cook time: 20 minutes
This recipe will make approximately 18 matzoh balls
2 eggs
1/2 tsp. salt
1/8 tsp. black pepper
1 cup almond flour
1/3 cup potato starch
1 tbsp. milled flax seed
Pinch of dried dill (tiny bit less than 1/8 tsp.)
1/4-1/2 tsp. dried parsley
1 tbsp. grapeseed oil
2 quarts chicken stock
Mix dry ingredients together, including herbs, making sure to get out any lumps in the almond flour and potato starch.
Whisk together eggs and grapeseed oil.
Add egg mixture to dry mixture, stirring together until all is incorporated very well. Cover bowl and refrigerate for at least two hours, a few hours longer is better.
Bring chicken stock to a boil.
Roll matzoh mixture into 1-inch balls.
Drop dough into boiling stock.
Cover and simmer for about 20 minutes. The matzoh balls will puff up and start to float as they cook. After they begin to cool, they will deflate but will still be delicious! Serve a few matzoh balls with the soup in each bowl.
Enjoy!
Labels:
chicken,
dairy-free,
entree,
gluten-free chicken and dumplings,
gluten-free matzoh ball soup,
matza,
matzah,
passover,
pesach,
soup,
soy-free
Tuesday, April 19, 2011
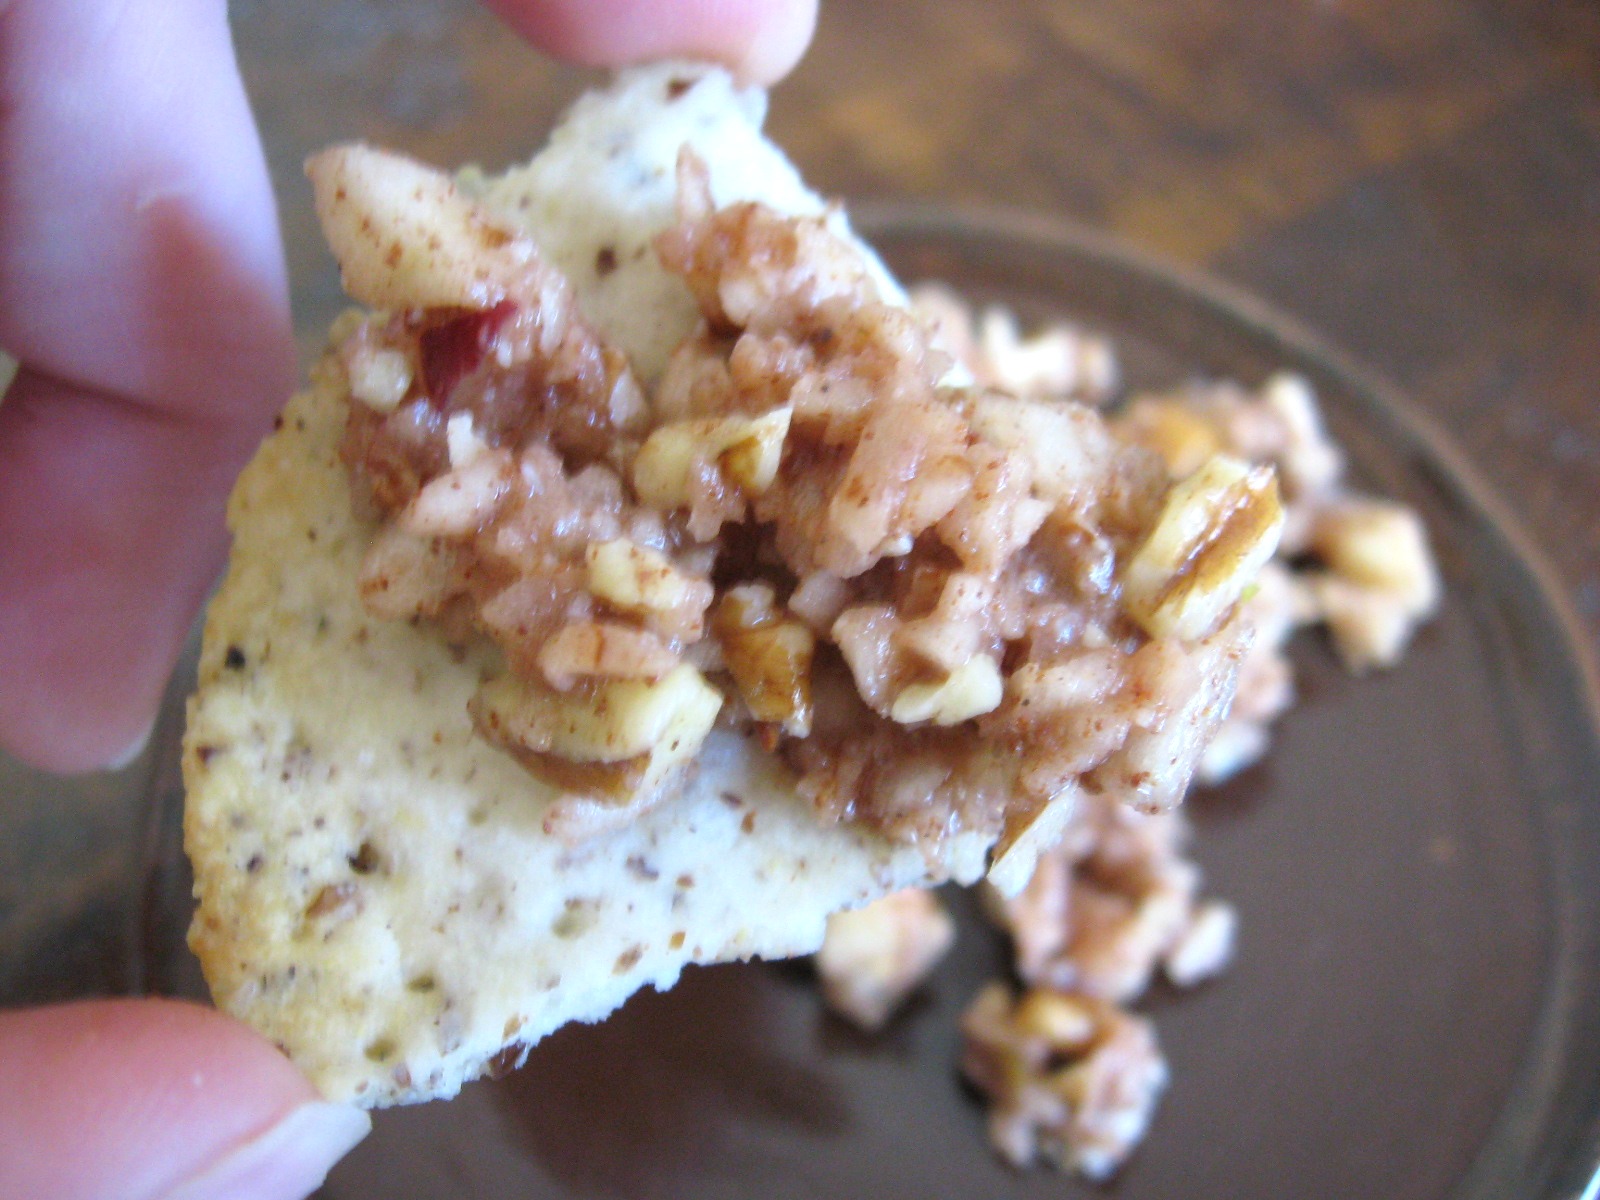
Charoset (and Gluten-Free Matzoh Crackers)
![]() |
| Charoset on matzoh cracker |
Growing up, I always celebrated two holidays around Christmas and Easter - Hanukkah and Passover (Pesach). Our family isn't Jewish, but we celebrated those holidays with family and Jewish friends because not only was it special to some of our friends, those holidays are after all a part of the roots of the Christian religion so they are special to us.
Now that I have children of my own, I want them to have knowledge of the history behind these holidays and understand what they are about and why they are so important, so we also celebrate them.
I realize it's a little late, since celebration of Passover began last night for those in the Jewish faith, but I'll be sharing a few Passover recipes as well as Easter recipes over the next week or so (so there will most likely be late Easter recipes, as well).
This charoset recipe is the one that my grandmother used and we all love it, especially served over matzoh crackers. I know some people don't care for matzoh crackers, but I always loved them. The gluten-free ones I make are delicious - I think even better than the gluten version! Both the charoset and matzoh cracker recipes are vegan, dairy-free, egg-free and soy-free as well.
For the matzoh crackers, I use this recipe from Living Without. I make it with coconut oil, but it's also very good made with butter for a flakier, buttery cracker for any time of the year. It's an excellent cracker that I always wish I made more of. It's kind of addicting, actually! (If you like matzoh ball soup, check out this recipe.)
I think this charoset is good as soon as it's made, but I think it's even better after it has been sitting in the refrigerator for a while.
Projected start to finish time: 15 minutes
2 cups chopped apples
1 1/2 cups chopped pecans (or walnuts)
2 tsp. honey
2 tsp. cinnamon
4 tbsp. grape juice
Grated rind of half to a whole lemon
Chop pecans in a food processor.
Peel apples and run through food processor for quickest chopping.
Combine apples and pecans with honey, cinnamon, grape juice and grated lemon rind. Refrigerate until ready to serve.
Enjoy - we sure do!
Labels:
charoses,
dairy-free,
egg-free,
gluten-free charoset,
gluten-free matzoh,
haroset,
holidays,
kosher,
matza,
matzah,
matzo,
matzoh,
passover,
pesach,
snack,
soy-free,
vegan
Wednesday, April 13, 2011
Royal Grapefruit & Clementine Sorbet
Every year around Christmas I have a table selling Watkins (I'm an independent associate) at a local trade show. There are three things I do with the money from the booth. The first is buy some animals to donate to families in need through World Vision. This is a fun thing to do at Christmas and helps teach the children about those less fortunate. We usually purchase a goat as a Christmas present to ourselves, and then other animals (usually chickens and ducks) for Christmas presents to some family members.
The second thing I do is buy 12 months of Fruit of the Month club from Harry & David for my husband, daughters and myself. This is a treat we enjoy all year, and it's very worth the price in our opinion. (The third thing I do is use any remaining money to help with the rest of the Christmas presents!)
Our most recent fruit box from Harry & David was "Royal Grapefruit." Each one was beautiful (and of course this photo happens to be a little blurry and under bad lighting).
I have fond memories of eating grapefruit with my father many mornings with our breakfast. Grits with a pool of melted butter in the middle and a grapefruit half drizzled with honey. Oh, so good!
As I've gotten older, grapefruit has been harder on me. I can only eat a small amount at a time, so sitting down to a whole half is nearly impossible. I've missed it.
So when we had a whole box of the lovely fruit, I knew I didn't want it to go to waste but what to do? The girls were eating sections of it with nearly each meal but it would take a while to go through them and I wanted to use them up while they were still really good.
I noticed a recipe for grapefruit sorbet on the care card inserted in the box with the fruit and immediately had an idea for a variation of the recipe - and what better way to use up the grapefruit?
Projected prep time: 20 minutes; Projected churn time: 25-35 minutes
1 cup organic cane sugar
1 cup water
1 tbsp. grapefruit zest
A few curls of grapefruit rind
2 3/4 cups fresh-squeezed Royal Grapefruit (or other large grapefruit) juice
1/4 cup fresh-squeezed clementine juice
1 cup IZZE Sparkling Clementine
Grapefruit gummy candy, optional (Jelly Belly makes a good one)
Have your grapefruit zest and larger rind curls ready.
In a saucepan, combine the water and sugar, stir well. I use organic cane sugar, which has a browner color to it. It also dulls the natural color of the sorbet a little, but I wanted to use it instead of refined white sugar.
Bring to a boil and, continuously stirring, cook for about 1 minute or until the sugar dissolves.
Remove from heat and pour into a large bowl over zest and rind curls (you'll be removing the rind curls, so if you have something you can put them in - I used a tea ball - then that makes it easier) and set aside to cool.
Juice the clementines (they are small enough that I used a citrus press) ...
Spoon out any smaller seeds that the juicer screen didn't catch.
Combine the two juices and add the Izze Sparkling Clementine.
Remove grapefruit rind curls from sugar syrup and set aside for garnish. Pour juice mixture into zest and syrup and whisk together.
Pour into ice cream maker (I use a Cuisinart
Spoon sorbet into an airtight freezer-safe container and freeze until firmer. I took the final photos after it had been freezing for about 2 1/2 hours. It got firmer after that. You can also eat it just like this as a slush. After I spooned it into the freezer container, I spooned out the rest and ate every last bit.
Garnish with sweetened grapefruit rind curls, clementine wedges and grapefruit gummy candy if desired.
Enjoy every refreshing bite!
This post is linking up with Seasonal Sundays over at Real Sustenance. Check out the other great recipes celebrating the season!
Labels:
dairy-free,
dessert,
egg-free,
gluten-free sorbet,
gluten-free soup. soy-free,
recipe,
recipes,
snack,
vegan
Wednesday, April 6, 2011
Peach Poppy Seed Bread
I was a young teenager the first time I tasted peach poppy seed bread. My grandparents (mother's parents) traveled all over, and often, but one place they particularly loved was Taos, New Mexico. Sometimes they'd bring the family along for a couple of weeks on their Taos trips. One time they just brought my brother and me, for nearly a month. I was 15 on that trip, but I'd tasted this bread a year or two before.
I'm filled with a myriad of memories when I think of Taos. I won't go into all of those here, but I will tell you that food was among them. My grandmother appreciated great food and we discovered some amazing places and tastes on those trips.
There was a cafe on the outskirts of Taos that we discovered one summer. If any of you are Taos natives, maybe you can tell me for sure, but I believe the name was Northside Cafe? I tried googling such a place and it apparently doesn't exist anymore. They served amazing green chile chicken enchiladas and some delicious peach poppy seed bread.
On future trips to Taos, we would have these enchiladas and bread for at least one of our meals. I know the combination of enchiladas and peach poppy seed bread probably doesn't sound like the best, but for some reason it worked for us back then.
Sometimes we would order a meal to go, and eat it as a picnic on a hike through the mountains or along the river. My grandmother would cut everything up into portions and serve them to each of us. I still remember how she would hold the knife and cut each thick slice of bread/brownie/cake/whatever into smaller rectangles. We would secretly joke how sometimes she would cut a larger portion for herself. She lost her battle to cancer 10 years ago at quite a young age, but I still miss her.
Memories, good and bad, often involve food. This is one of the reasons that sometimes when we discover a way to make something, we get so excited about it. It's not just the taste, texture, smells and colors that excite us, but also the memories that are evoked when we rediscover something familiar yet distant.
It was this way for me when I learned about the Gluten-Free Ratio Rally that some amazing food bloggers came up with. Ratio baking allowed me to recreate the peach poppy seed bread from years ago.
![]() |
| Logo designed by Anile Prakash |
The Ratio Rally posts began last month with various gluten-free pancakes. You can read about how it started, as well as a pancake recipe and links to all participating pancake recipes, in this post by Shauna James Ahern from Gluten-Free Girl and the Chef.
(This month's host is Silvana's Kitchen, where all the links are found for participants. More about that and her amazing recipe can be found at the bottom of this post if you want to scroll to it.)
Because this is my first Ratio Rally post, I'll take a moment to explain my reasons for getting behind this. The idea is based around the fact that each type of flour weighs a different amount. Rice flour is going to weigh a different amount than tapioca starch, for example, and for those of us who have to bake gluten-free, all of these different combinations of flours that are necessary for successful gluten-free baking most definitely weigh a different amount than wheat flours. When we try to convert a recipe calling for regular, all-purpose wheat flour to a gluten-free product, it's often a long process with much failure because of this. When you use the flours according to their weight, however, your chances of success improve. And you can even leave out things like xanthan gum. (To see how I finally got success with a cake recipe using the weight idea that I'd failed at for two years with measuring, see this post.)
When I started reading the rally posts last month, I became excited about the possibility of taking this weight for the flours idea and taking it to the next level with weight for each main ingredient being used in a ratio. They kept talking about Michael Ruhlman's book, Ratio: The Simple Codes Behind the Craft of Everyday Cooking - and I immediately decided to buy it. If you haven't checked this book out yet and you have any passion at all for cooking and baking, you have no idea what you're missing.
I excitedly flipped through the pages when I first got it, stopping to read long sections at a time. My excitement kept increasing. When my husband came home, I couldn't contain myself. "You've got to see this book I got that's written by this genius guy!" I exclaimed, making him laugh. I'll admit that he didn't get quite as excited as I had upon the discovery of ratio-based recipes, but he was happy to see me so excited, and more than a little happy at the prospect of more experimental yummyiness.
Another thing about ratio and weight baking is yes, you do need a scale. This is a good thing - I've discovered that by doing it this way, I can dump pretty much everything into a bowl (one ingredient at a time, zero it out after each addition) and I'm dirtying less dishes. No measuring cups. This is the scale I use
Of course, I still have recipes that I've perfected using measuring cups and spoons. That's okay. I can still use those if I want. This ratio baking gives me the freedom to try new flavor combinations that pop into my head, without the usual frustration of trying it over and over again in different amounts of flour, liquid etc. If I have a ratio, I can get it pretty darn close, if not the way I want, the first time. I have a better idea of what I need to try to add and/or omit the next time, and after the second or third try I may very well have a keeper.
This helps us out in the gluten-free world, because it gives you a ratio to follow for a specific type of food, and you can flavor it how you see fit. For example, the posts for this month's Gluten-Free Ratio Rally are quick breads. We are each able to make a unique bread using a ratio. The quick bread for this post works according to the ratio 2 parts flour/2parts liquid/1 part egg/1part fat.
One large egg weighs 2 ounces, so you work according to that. If you are using one egg, then you would use 2 ounces egg, 2 ounces fat, 4 ounces liquid and 4 ounces flour. For this recipe, I doubled everything.
The first try on this bread, it baked into a beautiful loaf that took nearly an hour and 20 minutes to bake, and it was still incredibly gummy. Not a bad gummy, but I didn't like the crumb. My family had no trouble eating it, however.
One thing I hadn't taken into account is that peaches are so juicy, and so not cutting back on the milk gave the batter too much liquid. Secondly, I had used an ounce of sweet rice flour and I felt that might be contributing to a more moist crumb than I wanted when there was already so much liquid in there. I needed to make it a tad sweeter, add a little more this, a little less of that ...
I also realized that I had mixed too much. Less is more when mixing the wet and dry ingredients together in this recipe.
The second try was beautiful. I loved every bit of it, except I felt it was just a tiny bit too salty. No one else did, and they gobbled it up. The first time I used unsalted butter, the second time I used salted butter. A nice compromise I've done in many recipes is to use both.
Another note is that I used fresh-frozen peaches. My dad had an amazing amount of peaches on his trees this past summer and I was blessed with an abundance of frozen peaches after he and my daughters picked a few hundred. (Thanks, Dad!) Using frozen peaches versus fresh or canned may make a difference in the texture. Going by weight should help, especially if you make sure to drain them very well regardless of what form they are in.
I'm providing the recipe in ounces because that's what the ratio uses. You'll notice that I also add milled flax seed to the recipe. I like to use it often in my baked goods for its nutritional benefit.
Peach Poppy Seed Bread
Projected prep time: 10 minutes (not including bringing everything to room temperature); Projected bake time: 50 minutes to 1 hour, 5 minutes (or until a knife inserted in the center comes out clean)
Make sure to have your ingredients at room temperature.
Ingredients:
1 ounce tapioca starch/flour
1 ounce potato starch (not potato flour)
1 ounce white rice flour
1 ounce almond flour
4 ounces brown rice flour
1/4 ounce (1 tbsp.) milled flax seed
1 tsp. kosher salt
4 1/2 ounces organic pure cane sugar
2 tsp. aluminum-free baking powder
2 tbsp. poppy seeds
1 tsp. pure almond extract
6 ounces milk
2 large eggs
2 ounces salted butter (melted)
2 ounces unsalted butter (melted)
5 ounces well-drained peaches, sliced and cut (see note above, I used fresh-frozen)
Bring your ingredients to room temperature (this is especially important when using butter - you don't want cold ingredients to make your melted butter chunky) and preheat the oven to 350 degrees. Grease a loaf pan.
Sift flours together and combine with flax seed, salt, sugar, baking powder and poppy seeds.
Whisk together milk, eggs, melted butter and almond extract until they are incorporated very well.
Add dry ingredients together with the liquid mixture and use a spoon to stir together just until mixed. Gently fold in peaches.
Pour into loaf pan and bake at 350 degrees for 50 minutes to just over an hour. It took mine just under an hour in a gas oven. Check at 45 minutes, but it will most likely take a little longer. The bread is done when a knife inserted in the center comes out clean. The top will also bounce back just a little if pressed lightly.
Place pan on a wire rack to cool. A note: The flavors will come out better and the bread will crumble less the longer it cools.
I love the flaky top this bread produced. This bread tastes very much like the bread I remember eating in Taos with my grandparents. I'd never looked for a peach poppy seed bread recipe before, but I immediately knew that was the bread I wanted to try to recreate for the rally. I'm glad I did.
There are many individuals participating in this rally and sharing their quick bread recipes today. I hope you'll visit each one and try some (or all!) of the recipes out. You can see all of these people and the links to their recipes at Silvana's Kitchen. She is hosting the rally this month. Thank you, Silvana! (The recipe she posted is for Gluten-Free Chocolate-Coated Marshmallow-Topped Vanilla Cupcakes. Who wouldn't want to try those?? All the recipes look delicious - I'm thinking I may try one every few weeks!)
And thank you to the individuals who started this rally and have encouraged others to give it a try. I'm glad they did!
Labels:
bread,
gluten-free ratio rally,
recipe,
recipes,
snack
Sunday, April 3, 2011
Creamy Chicken Lasagna (a.k.a. Christmas Lasagna)
I can't even begin to describe how delicious this lasagna is - you'll have to taste it for yourself if you want an accurate assessment. It's good.
I made this for my oldest daughter's birthday dinner. She wasn't sure what she wanted that night, and I'd had my mind on this dish for a while, wanting to try it out. I showed it to her, and she enthusiastically agreed that she wanted me to test it out for her birthday meal. We are all very glad I did. I will also add that the leftovers of this lasagna were just as good, if not better, than the fresh-from-the-oven servings. It also lasted several meals because it's such a rich dish.
And why post this recipe when it's so late after Christmas? Because it's so good, for any time of the year. We didn't make this for Christmas, but with the pretty red, green and white colors this lasagna produces, I'm definitely considering making it during the season. We usually have chili on Christmas Eve with a Thanksgiving-type meal on Christmas day, but this dish is so good I may very well make this our Christmas Eve dinner, or at the very least make it sometime the week before Christmas in the future.
I adapted this recipe from the one here at my dear friend Ginny's blog, Cooking with Chopin, Living with Elmo. You should check her site out - it's filled with yumminess and heartwarming stories.
Projected prep time: 45 minutes; Projected bake time: 30-45 minutes
Chicken filling:
2 tbsp. olive oil
1 large yellow onion, diced
5 cloves garlic, pressed
1 pound cooked chicken, cut in small pieces or shredded (omit if vegetarian or replace with white cannellini beans)
1/2 tsp. kosher salt
1 tsp. dried Italian seasoning
1 10-ounce package frozen spinach, thawed and drained
Tinkyada lasagna noodles
Cream sauce:
2 sticks unsalted butter
1 1/2 cups gluten-free flour blend (I used blend of garfava, brown rice, potato starch, tapioca starch and sorghum flours. Use what you want, just make sure it's a blend that doesn't contain xanthan gum, salt, baking powder or soda)
3 1/2 cups gluten-free chicken broth
1 cup heavy whipping cream
2 cups shredded or crumbled Parmesan cheese
1 1/2 tsp. kosher salt
1/2 tsp. black pepper
Dash cayenne pepper
Handful chopped fresh parsley
1 4-ounce jar of diced pimentos
1 1/2 cups mozzarella cheese
1 1/2 cups Monterey jack cheese
Grease 9x13 baking dish.
Prepare Tinkyada lasagna noodles according to package directions for the energy-saving method (boil for a couple of minutes and then let them sit) until they are al dente. You want them fairly firm. When they are ready, drain and rinse with cold water, then gently toss them with olive oil to prevent sticking and set aside.
While the noodles are cooking, start on your chicken filling. Heat olive oil over medium heat, add onions and cook until clear. Add pressed garlic (or minced garlic) and cook a few more minutes, without browning the garlic.
Add chicken, salt and Italian seasoning. Taste to see if more salt is needed. Mix in the spinach and cook for another 4-5 minutes, then set aside.
Now get started on the cream sauce. In large saucepan, melt butter over medium heat until bubbling. Add flour a little at a time, whisking continuously, until flour is well-incorporated and smooth with the butter.
Add the chicken broth a little at a time, quickly whisking the entire time, until smooth. It may seem to get hard and clump together at first, but if you continue to whisk and stir, it will smooth out. It's worth the little extra work. The end result will be a thicker, soup-type sauce.
Add whipping cream and one cup of Parmesan cheese. Stir in the salt, black pepper and cayenne pepper. Continue to stir until cheese is melted and incorporated into sauce. When you use the sauce, you may notice that some of the flour has settled to the bottom. Just stir it again to incorporate.
Remove from heat and add pimentos and parsley, stirring well. Add more salt and pepper to taste.
In a separate bowl, toss the mozzarella and Monterey jack cheeses together.
Preheat oven to 350 degrees.
Spread a layer of the cream sauce in the bottom of the baking dish.
Sprinkle one cup of shredded cheese mixture on top of the sauce.
Layer lasagna noodles over the cheese, then spread half of the chicken/spinach mixture on top of the noodles. Top the chicken/spinach with one cup of the shredded cheese, and then add about a third of the remaining cream sauce on top of that.
Repeat with another layer of noodles, the remaining chicken/spinach mixture, one cup of the cheese mixture and one-third of the cream sauce.
Spread the remaining noodles in a layer on top and cover with the remaining cream sauce.
Sprinkle the remaining cup of Parmesan cheese over the top.
(*If you are making this ahead of when you are serving it, you can stop at this step and refrigerate it a day before you bake it. Add 10-20 minutes to the bake time if you do this.)
Bake for 30-45 minutes until the lasagna is bubbling, then remove from oven. Let it stand for 10-15 minutes before cutting.
Enjoy every bite!
Labels:
chicken,
christmas lasagna,
creamy chicken lasagna,
entree,
gluten-free lasagna,
pasta,
recipe,
recipes,
vegetarian
Subscribe to:
Posts (Atom)