Showing posts with label holidays. Show all posts
Monday, December 24, 2012
Merry Christmas!
Merry Christmas from my family to yours. I hope you have a holiday surrounded with love, blessings and happiness.
Thursday, November 29, 2012
Two Year Anniversary and a Giveaway
**The giveaway is now over. Congratulations to April for winning the cookbook and cooling racks, and thank you to all who participated! Happy baking!
Yesterday was my two-year blogiversary, but I was swamped and wasn't able to post this until today. Happy Anniversary to Mama Me Gluten Free! It's been an exciting two years and I've loved getting to know so many of you, as well as fellow bloggers.
Tis the season for joy, sharing and giving, and I am so THRILLED to share this blogiversary by celebrating YOU, readers, by giving away an awesome cookbook recently published by one of those fellow bloggers I've enjoyed getting to know. Jeanne Sauvage of Art of Gluten-Free Baking blog has generously donated a signed copy of her new cookbook, Gluten-Free Baking for the Holidays: 60 Recipes for Traditional Festive Treats
. I enjoyed sharing a lunch with Jeanne and a couple of other bloggers at P.F. Chang's in Austin last summer during the IACP convention, and had a great time laughing and sharing stories with all of them. Jeanne is funny, smart and friendly. I know you don't want to miss out on her book. It's gorgeous. And the recipes are amazing. Jeanne is an artist baker and some of these recipes are unbelievable! (Thank you for making this possible, Jeanne!)
In addition to Jeanne's fabulous book, I'm including this 3-tier Wilton cooling rack
- because every person needs stacking cooling racks when baking! The combination of the book and cooling racks would make an amazing gift for your favorite gluten-free loved one (even if that loved one is yourself!) - so read the directions below on how to maximize your chance of winning and getting multiple entries.
Now, here's how to enter:
This giveaway is for one signed copy of "Gluten-Free Baking for the Holidays: 60 Recipes for Traditional Festive Treats" and one set of 3-tier Wilton cooling racks, and the entry period begins today, November 29, 2012 and will end on Thursday, Dec. 6, 2012 at 12:00 p.m. (noon) CST. The winner will be picked through the Random Sequence Generator on Random.org.
You are eligible for up to seven entries in this giveaway. To enter:
1. Leave a comment on this post telling me your baked holiday treat (only one comment per person will be counted this way, and this counts as one entry).
Additional entries may be earned by leaving a comment EACH TIME you do one of the following (you get an entry for each one only if you leave a comment for each):
2. "Like" Mama Me Gluten Free on Facebook (if you already "like" the blog on Facebook, that also counts as an entry) and leave a comment here telling me you've done this.
3. Follow @MamaMeGF on Twitter (if you already follow, that counts as an entry), then leave a comment here telling me you've done this.
4. Share this giveaway on Facebook with a link to this post, and leave a comment here telling me you've done this.
5. Share this giveaway on Twitter: "I want to win "Gluten-Free Baking for the Holidays" & cooling racks @MamaMeGF! http://bit.ly/V6zVvw " and then leave a comment here telling me you've done this.
6. Subscribe to Mama Me Gluten Free RSS feed, then leave a comment here telling me you've done this. (If you already subscribe, then that counts too - just leave a comment letting me know!)
7. "Like" Jeanne's page on Facebook and then leave a comment here telling me you've done this.
You must leave a comment on this post for each of things if you want an entry for each one. Only one comment per item per person will be counted. In other words, if you comment more than one time saying you "like" Mama Me on facebook, only one of those comments will be counted, etc. On the other hand, if you only leave one comment saying you did all of these things, you will only get one entry rather than seven.
********Be sure to leave a contact email if you are posting anonymously or don't have a way to contact you listed in your profile!
Good luck!
*In the interest of full disclosure, Jeanne Sauvage provided a copy of this book for my giveaway. I was not compensated in any other way, and the opinions of this book are entirely my own. Mama Me Gluten Free is providing the cooling racks.
**The giveaway is now over. Congratulations to April for winning the cookbook and cooling racks, and thank you to all who participated! Happy baking!
Wednesday, November 14, 2012
Squash Casserole and Thanksgiving Menu
It's here again - exactly one week and one day away. Thanksgiving. Are you cooking yet? Are you baking yet? (We've been sick over here in my house, so I'm not. I hope to get to it SOON.)
We have much to be thankful for, even when things don't seem to be going our way, and I'm trying hard to continue counting my blessings each day. Among so many other blessings I'm counting, this year I am thankful that all the scary stuff with my health last year turned out not be cancer or an illness we feared with a poor prognosis. Chronic Fatigue Syndrome is no walk in the park, but I'm learning to live around it.
![]() |
| Some of our wall art for Thanksgiving last year - a painting by one of my daughters and leaves the girls made to scatter around the house. |
My Thanksgiving menu this year is the same as last, with my goal once again to get as much of it prepared as I am able, and not fret if I don't get every recipe made. (Here is last year's post: http://mamameglutenfree.blogspot.com/2011/11/thanksgiving-menu.html)
Thanksgiving Menu:
-Turkey (roasted)
-Gravy (Just whisk together some of the turkey juice with some butter and sweet rice flour or brown rice flour over heat)
-Crockpot cornbread dressing (stuffing)
-Squash casserole (see below)
-Sweet potato casserole
-(Dirty rice, if I have time - another one I grew up with!)
-Broccoli with cheese
-Corn (from my brother-in-law's family farm, sauteed in butter)
-Marinated beets
-Yeast rolls
-Cranberry bread
-Cranberry sauce
-Cranberry jelly
-Fruit salad
-Pecan pie tarts
-Pumpkin pie
-Fresh whipped cream
-(And apple pie if I have time!)
This year I'm adding the recipe for squash casserole to the list (I didn't have the recipe for you last year), and I hope one day I'll have all the recipes on this menu available to you. Maybe one a year??
I'm proud to be able to share the squash casserole with you. It's a recipe from my grandmother and has been in my family for as long as I can remember. I've loved it as long as I can remember, and I love that I've passed my love for it on to my daughters. We always have it at Thanksgiving and Christmas, but it's equally good for other meals during other times, as well. The wonderful thing about this recipe is it's very simple and even the prep is mostly just cooking it on the stove with no stirring. It's also nice because you can freeze squash from your summer garden in advance for the casserole months later. You can also prepare the entire dish a few days in advance.
Squash Casserole
(Printable Recipe)
5-6 medium yellow squash (zucchini also works), sliced 1/4-inch thick
1/2 medium size white onion, chopped
1/4 cup plus extra seasoned bread crumbs (I just make my own and use Italian seasoning)
Light olive oil or grapeseed oil
Kosher salt, to taste
Cayenne pepper, to taste
Black pepper, to taste
Pinch of dried oregano
Place sliced squash in large saucepan with small amount of salted water, cover and steam until tender. Drain.
In small amount of light oil in a large pan, cook chopped onion until tender. Add seasonings and squash. Chop squash until broken. Cook until most of the water has evaporated.
*At this point you can freeze it if you want, for use later.
Heat oven to 400 degrees.
Add 1/4 cup seasoned bread crumbs and stir until combined.
Place in shallow greased baking dish (I use a glass pie pan).
*At this point you can put plastic wrap on top and refrigerate it for a few days - making this an easy dish to prepare in advance.
Sprinkle more seasoned bread crumbs on top.
Bake at 400 degrees until squash is heated through and breadcrumbs are browned - usually about 10-15 minutes.
Enjoy!
Have a WONDERFUL Thanksgiving, everyone!
Wednesday, November 7, 2012
Date Pecan Bundt Cake with Orange Glaze
This cake is good. Really good. It only lasted a day in our house - a few bites here, a few bites there for dessert and snack and then a few slices toasted for breakfast the next morning (served with some eggs, of course). It was gone, and as I'm typing this and listening to election coverage at the same time, I'm in desperate need of another slice ...
You'll notice that the title says this is a bundt cake, but the pictures don't tell that truth. Something happened to my bundt pan and when I finally had the last-minute chance to make this cake, I didn't have time to get another one. I don't recommend you using your angel food cake tube pan for this recipe, but that's what I did. It was a huge mistake as I lost a bit of batter from the bottom of the pan as the batter started getting hot and rising. Thankfully I was able to clean it up from the bottom before the cake had a chance of falling and put some aluminum foil down for the rest of the drippings - and salvaged everything without that dreaded smoke taste!
Many thanks to Adina from Gluten Free Travelette for hosting our Gluten-Free Ratio Rally this month and giving us the challenge of bundt cakes. Be sure to check out her delicious cake as well as the cakes the other participants have baked up for you. They all look amazing and you don't want to miss them!
If you aren't familiar with the rally, you can check out my rally page here, where I list the other rally posts and find out why we are so excited about the freedom we've discovered in our kitchens when we bake by weight and ratio.
![]() |
| Logo designed by Anile Prakash |
I chose the flavors in this cake because I was craving a dessert my grandmother makes (I really need to give you that recipe one day - it's incredible!) and with the holidays coming up, wanted to add a festive twist to the flavor with the orange glaze. I used Ruhlman's
ratio for pound cake, which is 1 part butter: 1 part sugar: 1 part egg: 1 part flour, but reduced the amount of butter by a fourth and was pleased to see it still came out delicious. It really has a perfect texture that I was very pleased with.
Date Pecan Bundt Cake with Orange Glaze
6 ounces butter (1 1/2 sticks), at room temperature
8 ounces (228 grams) sugar
1 teaspoon salt
8 ounces egg (4 large eggs plus 1 large yolk), at room temperature and whisked lightly together
1 1/2 teaspoons pure vanilla extract
2.5 ounces (71 grams) tapioca starch
1 ounce (27 grams) almond flour
1 ounce (27 grams) sweet rice flour
1.5 ounces (42 grams) millet flour
2 ounces (54 grams) brown rice flour
1 1/2 teaspoons ground chia
seed
1 cup chopped dates (chop them yourself for best results and don't use the already chopped stuff)
1/2 cup chopped pecans
Orange glaze:
1/4 cup refined sugar
3 tablespoons orange juice
Zest of an orange
1/4 cup powdered sugar
2 tablespoons orange juice
Preheat over to 325 degrees and butter a bundt pan.
Mix flours together with ground chia seed.
Beat butter with paddle attachment in stand mixer (or however you mix if you don't have a stand mixer) at medium speed for about a minute.
Add the sugar and salt, then beat on medium-high until butter mixture becomes fluffy and lighter in color (about three minutes). Scrape bowl if necessary.
Have your eggs ready and lightly whisked together, then slowly add them to the butter mixture, continuing to beat until they are mixed in. Scrape bowl and mix a little more. Scrape again and mix in the vanilla.
Slowly add the flour with the mixer going at low speed. Scrape bowl and mix again just until everything is mixed together.
Pour batter into pan and bake at 325 for about 50 minutes to an hour. Cake is done when toothpick inserted into middle comes out clean. Let cake sit for 5-10 minutes, then turn onto plate and cool on wire rack to cool completely.
For glaze, heat refined sugar and zest with orange juice until bubbling and sugar is dissolved, then add powdered sugar and more orange juice. After cake has cooled, spoon over top and sides, letting sauce saturate the top of cake.
Enjoy!
Don't forget to stop by Adina's post and check out her cake as well as the other cakes this rally. Thank you again, Adina!
Thursday, February 9, 2012
Chocolate Covered Cherry Cream Cheese Cupcakes
I love chocolate-covered cherries. Do you? They are one of my dad's favorite candies and I have many fond memories of him sharing one of the sweets with me out of the special box in his stocking on Christmas Day or at his place on the table on Valentine's Day.
As I was trying to think of what to share with you this year (I already shared my chocolate covered cherry cookies and love story last Valentine's Day, and my favorite rolled and cut cookies to make into hearts for Christmas and St. Patrick's Day), I thought back to this chocolate-cream cheese cupcakes recipe my dear friend and college roommate Ginny posted last month.
Those cupcakes! When I saw her post, I was instantly transported to a time in my younger years when a friend's mother made cupcakes, only miniature, nearly identical to these on special occasions. I would pop them whole into my mouth and never got sick of them. I have that recipe and have made it a time or two and it's very similar, but there are a few differences - namely it is from scratch and doesn't use an easy cake mix.
With everything going on these days and my oldest daughter's birthday a couple of weeks ago and needing cupcakes for her class, I thought I'd make these super-easy delights that Ginny shared. Even the boys in third grade wanted the recipe.
The other day as I was mulling over what to fix for you this Valentine's Day, it occurred to me I should combine chocolate covered cherries into these amazing and simple cupcakes. Win!
In case you're wondering, Cella's chocolate cherries are gluten-free. And they happened to be on sale last week in my grocery store.
The combination was fantastic, and everyone loved these cupcakes. I hope you do, too.
Projected prep time: 15 minutes: Projected bake time: 25-30 minutes
Makes 24 regular cupcakes
(Printable Recipe)
1 box or bag gluten-free chocolate cake mix (I used Pamela's chocolate cake mix which is 21 oz.)
Ingredients required to prepare chocolate cake mix according to original recipe directions on bag (eggs, oil or butter, water or other liquid, etc.)
Filling:
12 gluten-free chocolate-covered cherries (Cella's brand is gluten-free), chopped into small pieces
1/4 cup semi-sweet chocolate chips
1 8-oz package cream cheese
1 large egg
1/3 cup organic pure cane sugar
pinch of kosher salt
Preheat oven to 350 degrees and line cupcake tins with baking cups. (If you are using a gas oven, top rack will be best on this recipe.)
Chop chocolate cherries, save as much of the liquid as possible.
Place in bowl, liquid filling and all. Add chocolate chips. Set aside.
Beat cream cheese together with sugar, egg and salt until creamy.
Fold the chocolate cherries and chocolate chips into the cream cheese mixture.
It will have a lovely light pink color that won't stay through the baking, but it's okay. Set aside.
Drop chocolate cake batter into baking cups about 2/3 full.
If you want to attempt hearts on top of the cupcakes, place two spoonfuls slightly apart to make a heart shape on top of the cake batter. This will spread some and not keep the nice shape as much, but it's fun to try. I tried other ways, including filling a heart-shaped cookie cutter on top of the batter, to no avail. This spoon method worked best. If you don't want to mess with it, just drop a whole tablespoon onto the top of each.
Bake at 350 degrees for about 25-30 minutes or until the center is completely cooked. Cool on wire racks.
I found that what wasn't eaten within a few hours kept best in an airtight container in the refrigerator.
Enjoy!
Labels:
cake,
chocolate,
dessert,
desserts,
gluten free,
holiday baking,
holidays,
recipe,
recipes,
Valentine's Day
Wednesday, December 7, 2011
Cardamom Date Cookies
How many batches of cookies have you made for the holiday season so far? Let me tell you a little secret: This is my first batch.
Normally in the past, I've made quite a few tasty holiday treats at this point in the season and I didn't think this year would be any different. So far, however, it has been one busy thing after another. That's why I was quite grateful that this month's Gluten-Free Ratio Rally challenge was cookies. It's given me the kick I needed to put my mind in the holiday baking mood.
![]() |
| Logo designed by Anile Prakash |
If you aren't familiar with the Gluten-Free Ratio Rally, check out my rally page where I include all of my rally recipes as well as the very first rally post by Shauna Ahern of Gluten-Free Girl. Ratios and using weights have given me freedom in the kitchen I never imagined possible.
I began with Michael Ruhlman's suggestions for cookie dough ratios as I decided what kind of cookie I wanted to make for this challenge. I knew I needed something simple this time around that wouldn't take a long time to make, or (hopefully) take too many trials. Ruhlman's basic 1:2:3 cookie dough ratio suggests 1 part sugar: 2 parts fat: 3 parts flour. I wanted to make a drop cookie, however, and he suggests equal parts of sugar, fat and flour for drop cookies, with the addition of an egg.and some baking powder.
I was concerned that the gluten-free flours would create a dough that spread too much if I used an equal amount of butter, so I cut back on that just a little. I also used molasses as part of the sugar because I thought it might moisten the stickier flours a little more and help bind them with the rest of the ingredients. Using the egg as the starter 2 oz. in the ratio, my ratio ended up being 1:3:4:4 -- 1 part egg: 3 parts fat: 4 parts sugar: 4 parts flour. (2 oz. egg: 6 oz. butter: 8 oz. sugar: 8 oz. flour)
These certainly aren't a cookie that I traditionally make this time of year - I've never even tasted a cookie with these exact flavor combinations before - but the flavors were stuck in my head and I had to try them in this cookie. The whole family agreed the cookies are delicious - and the warmth and smell of the cardamom certainly fits into the season. The only thing I might change if I made them again is try adding more dates. Not too many more, but a few. This ended up being a cookie that spread a lot and were slightly crispy on the outside and a little chewy on the inside. The different sugars help with this.
Projected prep time: 10-15 minutes; Projected bake time: 7-9 minutes
(Printable Recipe)
1 large egg
6 oz. (1 1/2 sticks) unsalted butter
1 oz. (29 grams) organic pure cane sugar
2 oz. (57 grams) molasses
5 oz. (143 grams) pure dark brown cane sugar
2 oz. (57 grams) sweet rice flour
2 oz. (57 grams) tapioca starch
2 oz. (57 grams) sorghum flour
2 oz. (57 grams) brown rice flour
1/2 tsp. aluminum-free baking powder
1/2 tsp. kosher salt
1/2 tsp. pure vanilla
1/2 tsp. ground cardamom
1/4 tsp. ground cinnamon
1/2 cup (2 1/4 oz. or 62 grams) chopped dates (best to chop them yourself unless you wash any extra ingredients off dates bought already chopped)
Preheat oven to 350 degrees.
Sift flours together with baking powder, salt and spices.
Cream together butter and sugars. Add molasses, then add egg and mix together thoroughly.
Gradually add dry ingredients and mix well. Let stand a few minutes to moisten the flours. Fold dates into the dough.
Drop dough by tablespoon balls (a cookie scoop works well for this, especially as the dough isn't stiff enough to roll into balls) onto ungreased cookie sheets. Leave sufficient room for spreading - they will spread quite a bit.
Bake 7-9 minutes, or until cookies are browning on edges and mostly or completely cooked in center.
Let cookies cool on pans for several minutes before transferring to wire racks to finish cooling. They are a little crumbly when hot, but they are no longer crumbly when cool.
I hope you enjoy these as much as we did! If you don't have a scale yet and find all those numbers daunting, I can assure you that it's easier than measuring by cup - and less messy. And I just happen to be giving away a scale and a copy of Ruhlman's Ratio cookbook until noon (CST) today on my anniversary blog post - so hurry!
Please be sure and stop by Caroline's blog to see all the incredible cookies the rally participants baked up for you this season - thanks again, Caroline!
Wednesday, November 16, 2011
Yeast Rolls
Searching for a great-tasting gluten-free yeast roll that also has a great texture? You've stopped at the right place. These "rolls" might look more like muffins because they are baked in a muffin tin (how easy!), but they deliver that great yeast roll taste you're wanting for your Thanksgiving dinner or other occasion. Leftover turkey sandwiches, anyone?
For these rolls, I adapted my yeast bread recipe. Because the bread dough doesn't hold it's own shape very well, these need to be baked in greased muffin tins - which give them a look different from your traditional yeast rolls.
The verdict in my family was that these are really good. To save time on Thanksgiving Day, I'm thinking I may try making the dough the night before and sticking it in the refrigerator immediately instead of letting it rise at a warmer temperature. I think it will turn out okay, but I can't make promises on that until I try it. These are best served fresh and warm, so I'll be placing leftover rolls in an airtight bag and using them up pretty quick.
Projected prep time: 20 minutes; Rise time: 45 minutes; Bake time: 13-15 minutes
Makes 20 rolls
2 cups (298 g or 10.5 oz.) Pamela's bread mix and flour blend (NOT baking & pancake mix)
2 1/2 tsp. active dry yeast
1 1/4 cups (10 oz.) milk
1/2 cup (4 oz.) salted butter, cut in small pieces
1/4 tsp. kosher salt
1/4 cup organic pure cane sugar
1 egg
1 cup (137 g or 4 7/8 oz.) brown rice flour
1/3 (41 g or 1 1/2 oz.) millet flour
Melted butter
Combine Pamela's bread flour with yeast in a large mixing bowl and set aside. In a smaller bowl, combine brown rice flour and millet flour and set aside. (For detailed photos on making the dough, see the yeast bread recipe.)
Pour milk into a saucepan and add butter pieces, sugar and salt. Heat on medium until butter is melted and the temperature is 115 degrees.
Pour warm milk mixture over Pamela's flour and yeast, and beat with a wooden spoon several seconds until blended. Add egg and beat until incorporated. Place dough hook on mixer and beat at high speed for about two minutes. If you don't have a stand mixer, you can do this with a wooden spoon.
With mixer running at low speed, gradually add the remaining flours. Gradually increase speed as the flour combines until you can beat at medium-high without flour going out of the bowl. Beat for a minute and then scrape bowl with wooden spoon, then return to medium-high speed until everything is incorporated, about 30 seconds.
Transfer dough to a ceramic or glass bowl and cover with a damp cloth. Place in warm spot for 45 minutes. (I use my oven for this. I turn it to about 100 degrees and then turn it off before I start making the dough, and it's just right when I'm ready to let the dough rise.)
After 45 minutes, dough should be about double in size.
Grease 20 muffin tins. Stir dough once and then drop spoonfuls into muffin tins, filling about halfway. Wet your fingers and smooth out any bumps on the dough surface. Let it sit on the counter and rise again 15-20 minutes.
Preheat oven to 400 degrees. Bake for 13-15 minutes or until rolls are baked through. Immediately after pulling it out of the oven, brush tops with melted butter.
Let them cool on a wire rack.
Enjoy!
Labels:
bread,
gluten-free,
gluten-free yeast rolls,
holidays,
recipe,
recipes,
yeast rolls
Thursday, April 21, 2011
Meringue Easter Eggs
I'll start out by saying that I'm a sucker for meringues. I love them. There's something almost heavenly about them - they hardly weigh anything and have the most unexpected texture for something so hard. Yum.
These delightful beauties came as a complete accident the other night. I was attempting to make a totally different meringue shape - frogs to be exact - and they ended up looking like aliens. I'm not kidding. So, I had some meringue left over and a little extra oven room and decided that I'd make Easter eggs. I'm glad I did.
Because it was a rush job, I wasn't taking a lot of photos along the way as I usually do. I also didn't have much time to take photos to do the finished product justice (hence the much-doctored above photo - I thought it was festive, anyway).
I adapted this recipe from the "Froggy meringue cookies" recipe out of Jewish Holidays Cookbook
Projected prep time: 20-25 minutes; Projected bake time: 2 hours
4 egg whites
2 1/2 cups powdered sugar
1/2 tsp. pure vanilla extract
1/4 tsp. pure almond extract
Food coloring as desired
Preheat oven to 200 degrees and line baking sheets with parchment paper. If you have a gas oven, move your racks to the very top.
Have your egg whites at room temperature and beat them in a large bowl until they are foamy and light.
Add the sugar a little bit at a time, about a tablespoon, while continuing to beat the eggs at a medium-high speed. You may need to stop the mixer a couple of times and scrape some sugar down. When all of the sugar has been mixed in, turn the mixer to high and continue to beat until the meringue mixture is shiny and very stiff. Thick peaks will stand stiff when the meringue is ready. You may have to beat for a while to achieve this.
Remove some of the white meringue at this point if you want white piping. Also, you can remove extra to color different colors.
Add flavorings and food coloring to remaining meringue while mixing on low speed, then return to high to incorporate all of it. You may need to scrape some down.
Place meringue in pastry/icing bags or ziplocs with the tip of a corner cut off and with your main color(s), squirt egg-shaped dollops onto the parchment paper about an inch apart. You'll notice in my photos that I didn't give an inch for all of them. It was an accident and yes, they did puff into each other just a little and easily broke off. If you don't want that, put sufficient space between them.
Take your white color or any other color you have for piping and squirt meringue around the edges of each egg and decorate the tops.
Bake (top rack if gas oven) at 200 degrees for about 2 hours, possibly longer depending on the thickness of your cookies. The meringues should be hard all the way through and come right off the parchment paper. If you prefer to have a softer center, bake them for around an hour. The outside will be hard and have a great crunch, but the center will have a fantastic softer and chewy texture.
Cool pans on wire racks and then transfer meringues to an airtight container lined with wax paper. Store at room temperature. You don't want any humidity to be in that container, so make sure they are completely cooled.
Have fun with them! I do plan on making some of these at some point again - maybe not until next Easter, but when I do have new meringue eggs, I will also hopefully have better photos. I'll share them then.
And enjoy eating them! If I don't get another post in before Easter, have a blessed and very happy Easter!
I will be making hot cross buns with my family tomorrow. The last couple of years, I've used Living Without's hot cross buns recipe found here. They are good. However, I've missed the taste and texture of the hot cross buns my mom made for us every Good Friday while I was growing up. Tomorrow I'm attempting my own recipe/adaptation of the one she used. I'm hoping it works out! If it does, I'll share it with you soon. Again, have a happy and blessed Easter!
Tuesday, April 19, 2011
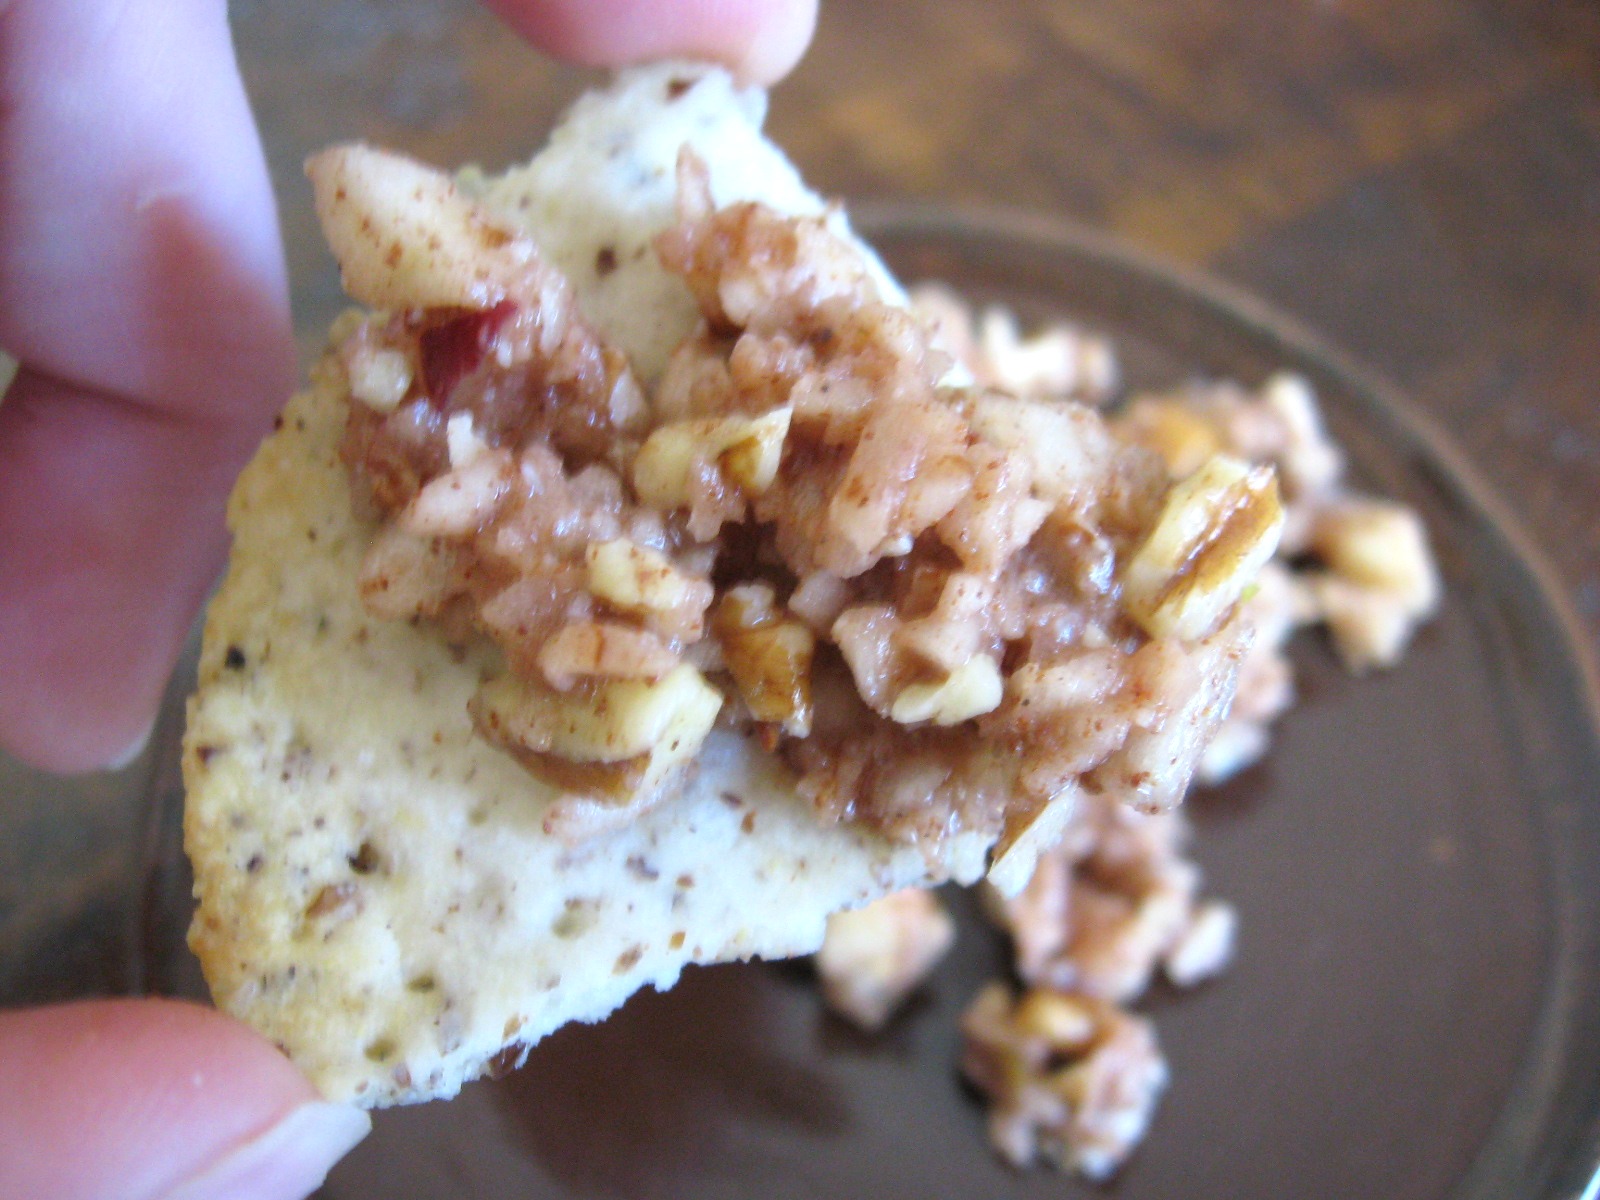
Charoset (and Gluten-Free Matzoh Crackers)
![]() |
| Charoset on matzoh cracker |
Growing up, I always celebrated two holidays around Christmas and Easter - Hanukkah and Passover (Pesach). Our family isn't Jewish, but we celebrated those holidays with family and Jewish friends because not only was it special to some of our friends, those holidays are after all a part of the roots of the Christian religion so they are special to us.
Now that I have children of my own, I want them to have knowledge of the history behind these holidays and understand what they are about and why they are so important, so we also celebrate them.
I realize it's a little late, since celebration of Passover began last night for those in the Jewish faith, but I'll be sharing a few Passover recipes as well as Easter recipes over the next week or so (so there will most likely be late Easter recipes, as well).
This charoset recipe is the one that my grandmother used and we all love it, especially served over matzoh crackers. I know some people don't care for matzoh crackers, but I always loved them. The gluten-free ones I make are delicious - I think even better than the gluten version! Both the charoset and matzoh cracker recipes are vegan, dairy-free, egg-free and soy-free as well.
For the matzoh crackers, I use this recipe from Living Without. I make it with coconut oil, but it's also very good made with butter for a flakier, buttery cracker for any time of the year. It's an excellent cracker that I always wish I made more of. It's kind of addicting, actually! (If you like matzoh ball soup, check out this recipe.)
I think this charoset is good as soon as it's made, but I think it's even better after it has been sitting in the refrigerator for a while.
Projected start to finish time: 15 minutes
2 cups chopped apples
1 1/2 cups chopped pecans (or walnuts)
2 tsp. honey
2 tsp. cinnamon
4 tbsp. grape juice
Grated rind of half to a whole lemon
Chop pecans in a food processor.
Peel apples and run through food processor for quickest chopping.
Combine apples and pecans with honey, cinnamon, grape juice and grated lemon rind. Refrigerate until ready to serve.
Enjoy - we sure do!
Labels:
charoses,
dairy-free,
egg-free,
gluten-free charoset,
gluten-free matzoh,
haroset,
holidays,
kosher,
matza,
matzah,
matzo,
matzoh,
passover,
pesach,
snack,
soy-free,
vegan
Subscribe to:
Posts (Atom)